MCP Access Configuration
The MCPCAN platform provides powerful and flexible authentication configuration features for MCP services that require access control. You can centrally manage access tokens and finely control how authentication information interacts with the backend MCP service.
1. Core Concept: Pass-through
"Pass-through" is a core concept of the MCPCAN gateway. It determines whether the client's authentication information is passed on to the final target MCP service after passing through the gateway.
Pass-through Off: When pass-through is off, the authentication token is only used for gateway-level authentication. After the gateway verifies the token, it will remove the authentication information before sending the request to the backend service. In this mode, the backend service is unaware of the authentication, and all security checks are handled by the gateway.
Pass-through On: When pass-through is on, the gateway will retain the original authentication information (such as the
Authorizationrequest header) after completing its own verification and pass it on to the backend MCP service. This is crucial for scenarios where the backend service also needs to perform identity verification.
2. Configuration Steps
Step 1: Enable Token Authentication
At the top of the configuration page, there is a global switch to enable or disable token authentication for the entire MCP service.
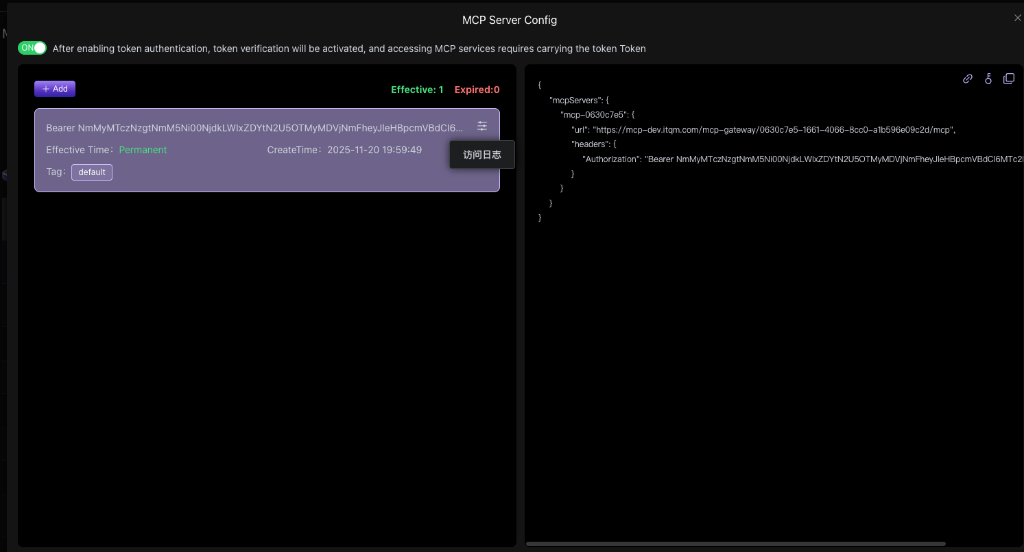 (Figure 1: Main Configuration Interface)
- ON: Enabled state. All requests to this MCP service must carry a valid token.
- OFF: Disabled state. The service will allow anonymous access.
Step 2: Add an Authentication Token
Click the + Add button to add a new authentication token.
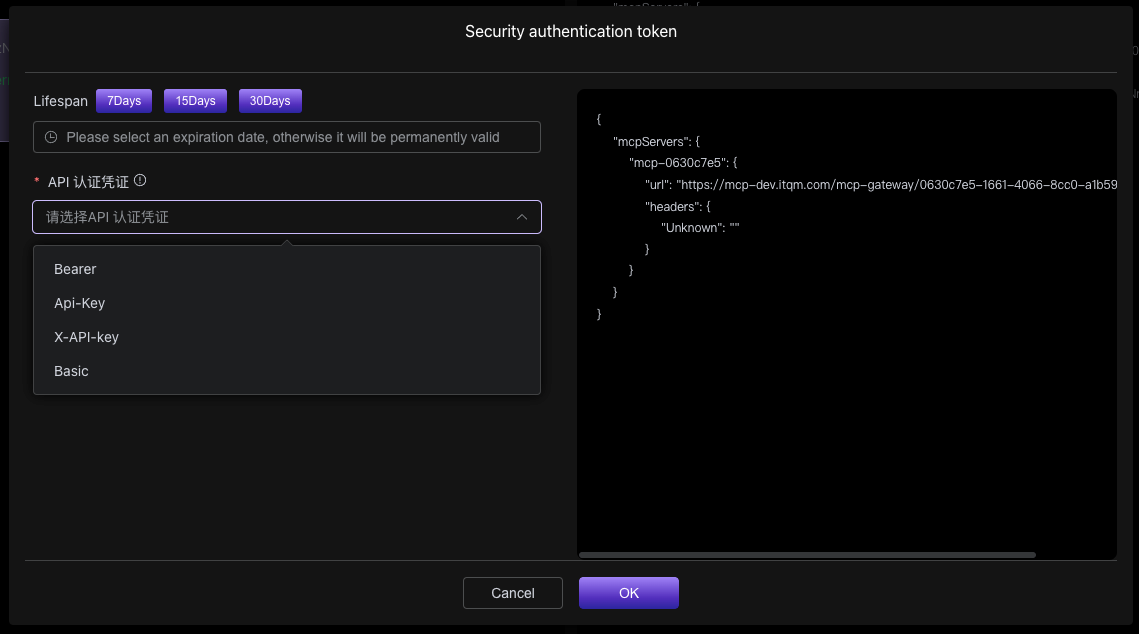 (Figure 2: Add Basic Authentication Information)
- Lifespan: Set the validity period of the token, which can be 7 days, 15 days, 30 days, or permanent.
- API Authentication Credential: Choose your authentication scheme and enter the corresponding token value.
- Type: Supports common authentication types such as
Bearer,Api-Key,X-API-key, andBasic. - Value: Paste your actual token string.
- Type: Supports common authentication types such as
Step 3: Configure Custom HTTP Headers (Advanced Feature)
In addition to the core authentication token, you can also define additional HTTP headers and set whether each header is passed through independently.
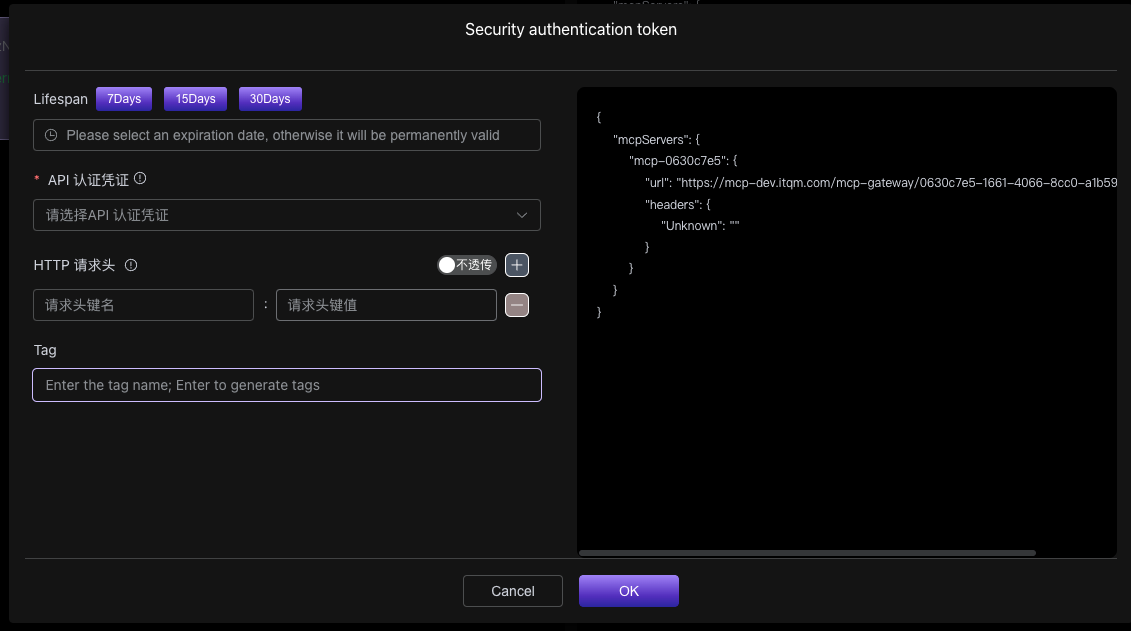 (Figure 3: Add Custom Headers and Set Pass-through)
- Add Header: Enter the desired header name and value.
- Set Pass-through: Each custom header has an independent "Pass-through/Do Not Pass-through" switch next to it.
Key Note: When a custom header is set to pass-through, the MCPCAN gateway will automatically inject this header into the request sent to the backend MCP service. This means that the client, when making a request, does not need to be and cannot be aware of the existence of these additional headers. This feature is very suitable for injecting fixed API keys or other identifiers required by the server without exposing them to the end user.
3. How the Client Should Use It
After completing the configuration, the platform will generate a standard mcpServers JSON configuration, which the client can simply copy and use.
{
  "mcpServers": {
    "mcp-0630c7e5": {
      "url": "https://mcp-dev.itqm.com/mcp-gateway/0630c7e5-1661-4066-8cc0-a1b59b2d1mcp",
      "headers": {
        "Authorization": "Bearer NmMyMTczNmEtNmI5Ni00NjdkLWIxZDUtYmU5OTMvMDVjNmFhZXljLjgxYmRh..."
      }
    }
  }
}
Client-side Notes:
- The client only needs to provide the main token configured in the "API Authentication Credential" (e.g.,
Authorization). - Any custom HTTP headers configured as "pass-through" on the platform side are handled automatically by the gateway; the client does not need to be concerned with or fill them in.