Sync mcpcan instances to N8N plugin
Create N8N Agent Platform
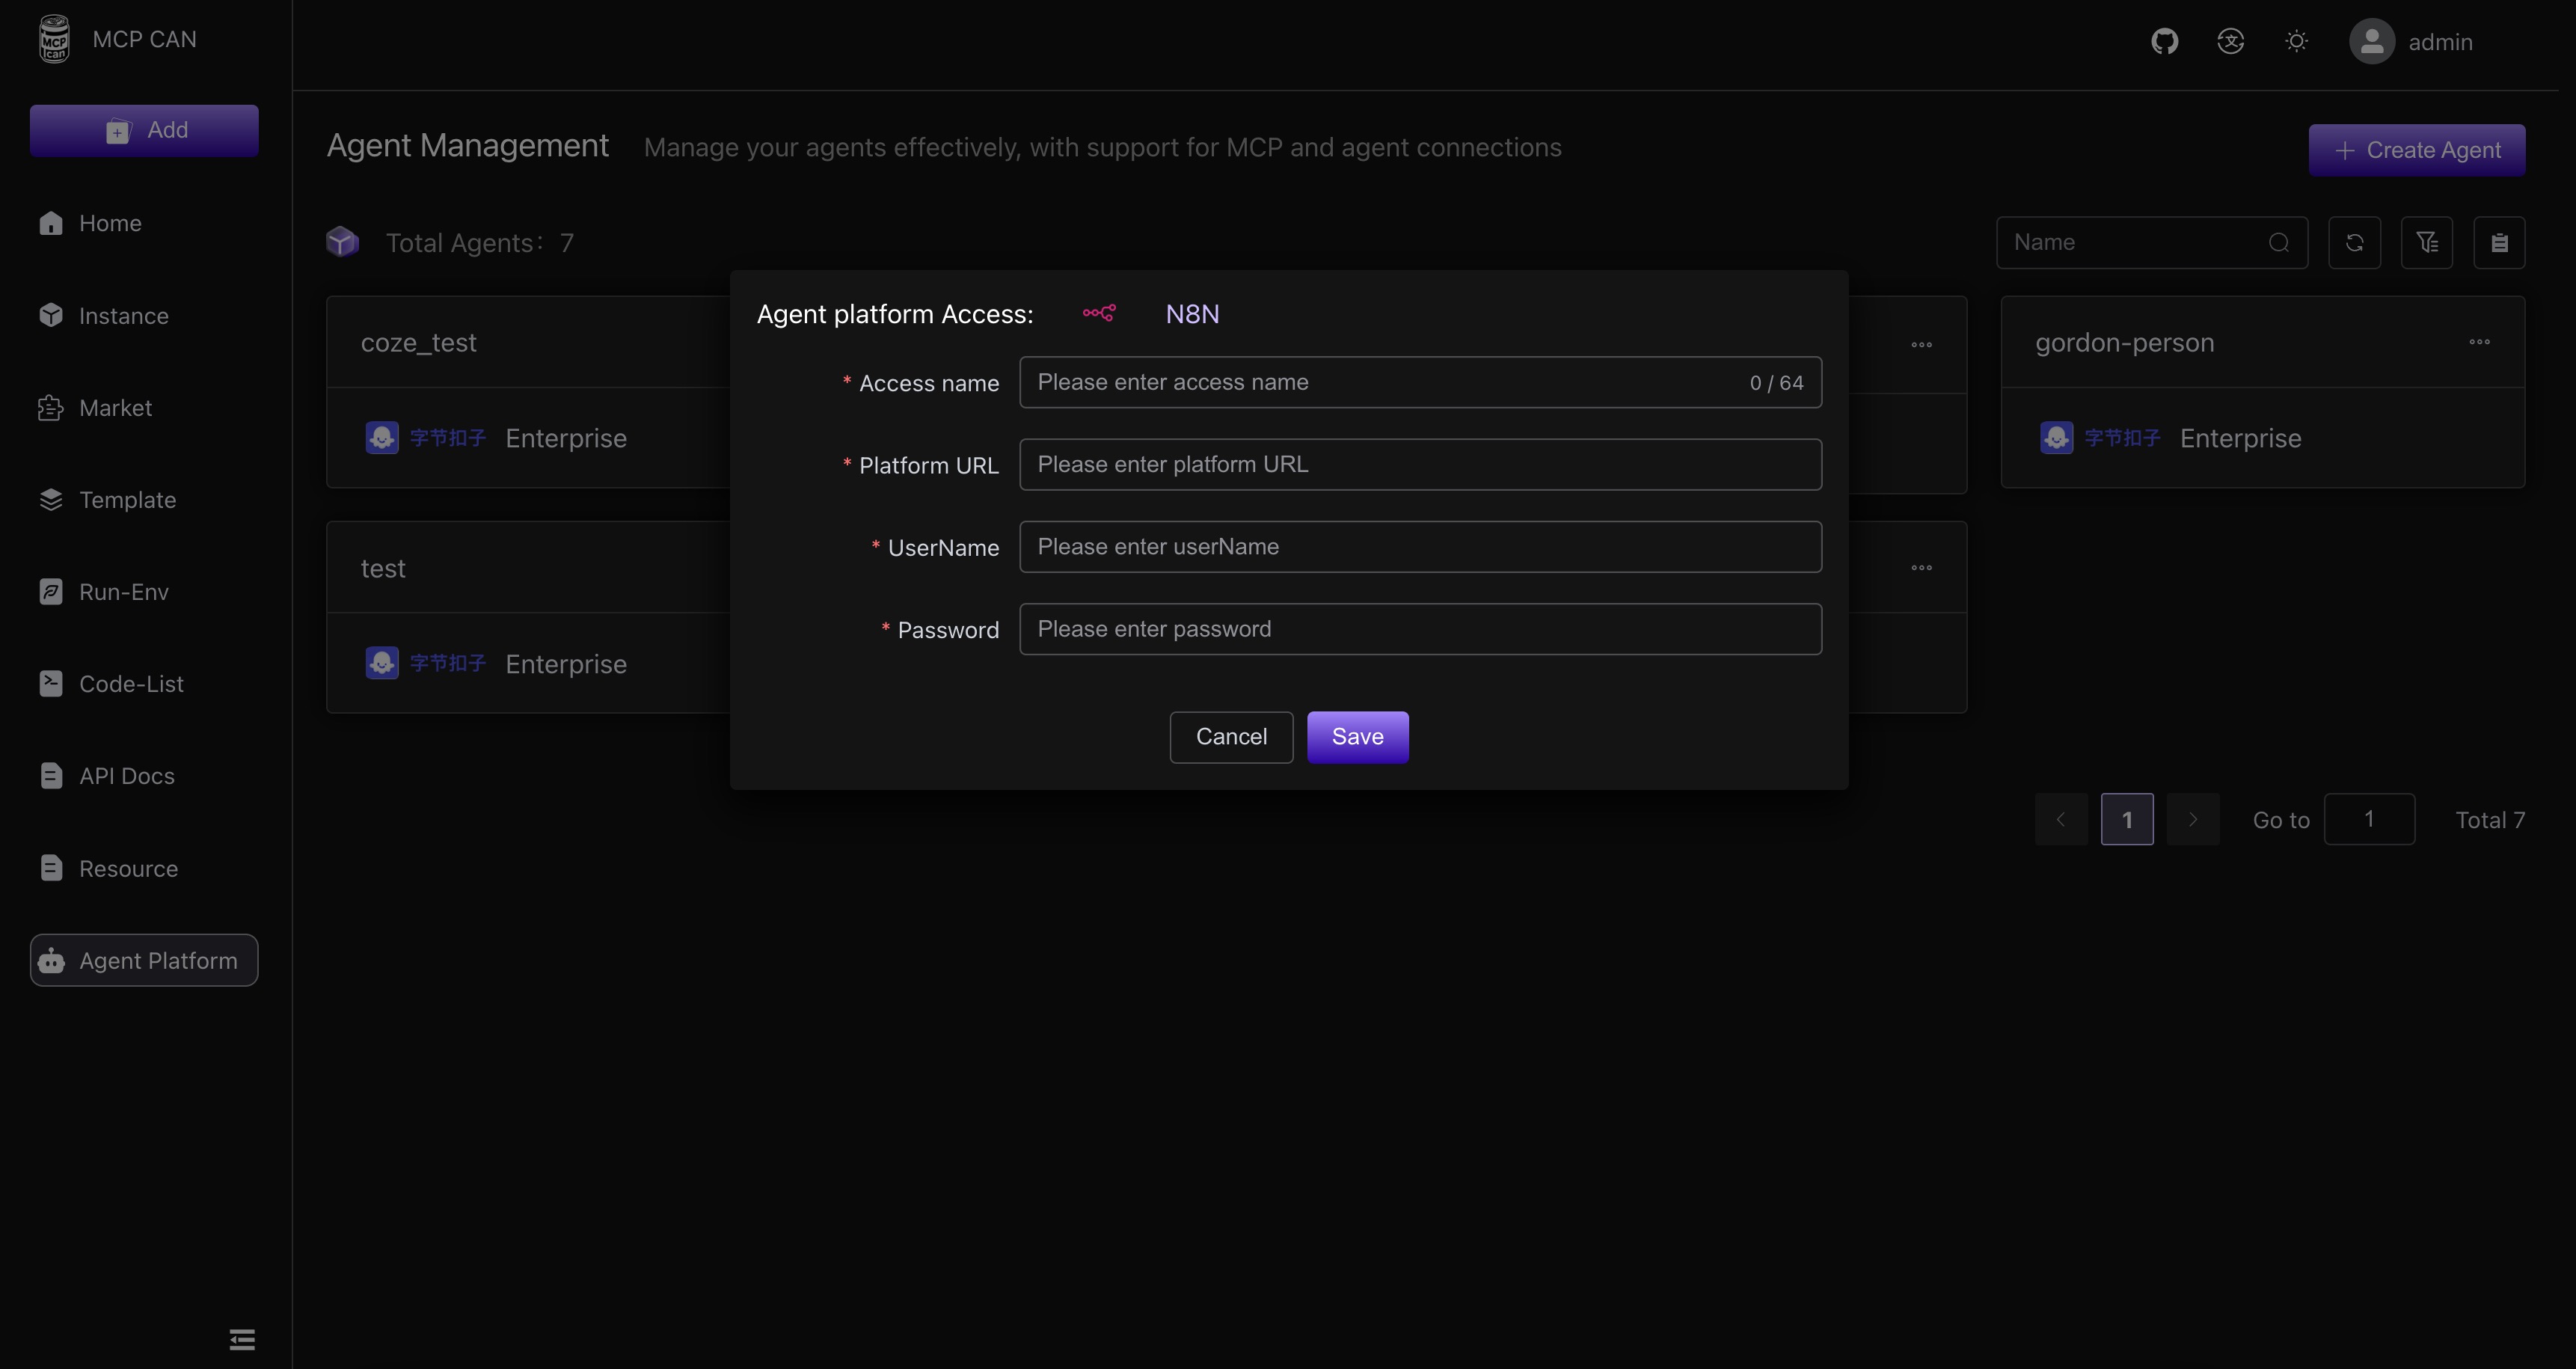
In the Agent Platform menu, click to create a new N8N commercial version. The Access Name can be defined freely. Fill in the Platform URL with the HOST address of N8N, and the UserName Password is the one to be synchronized.
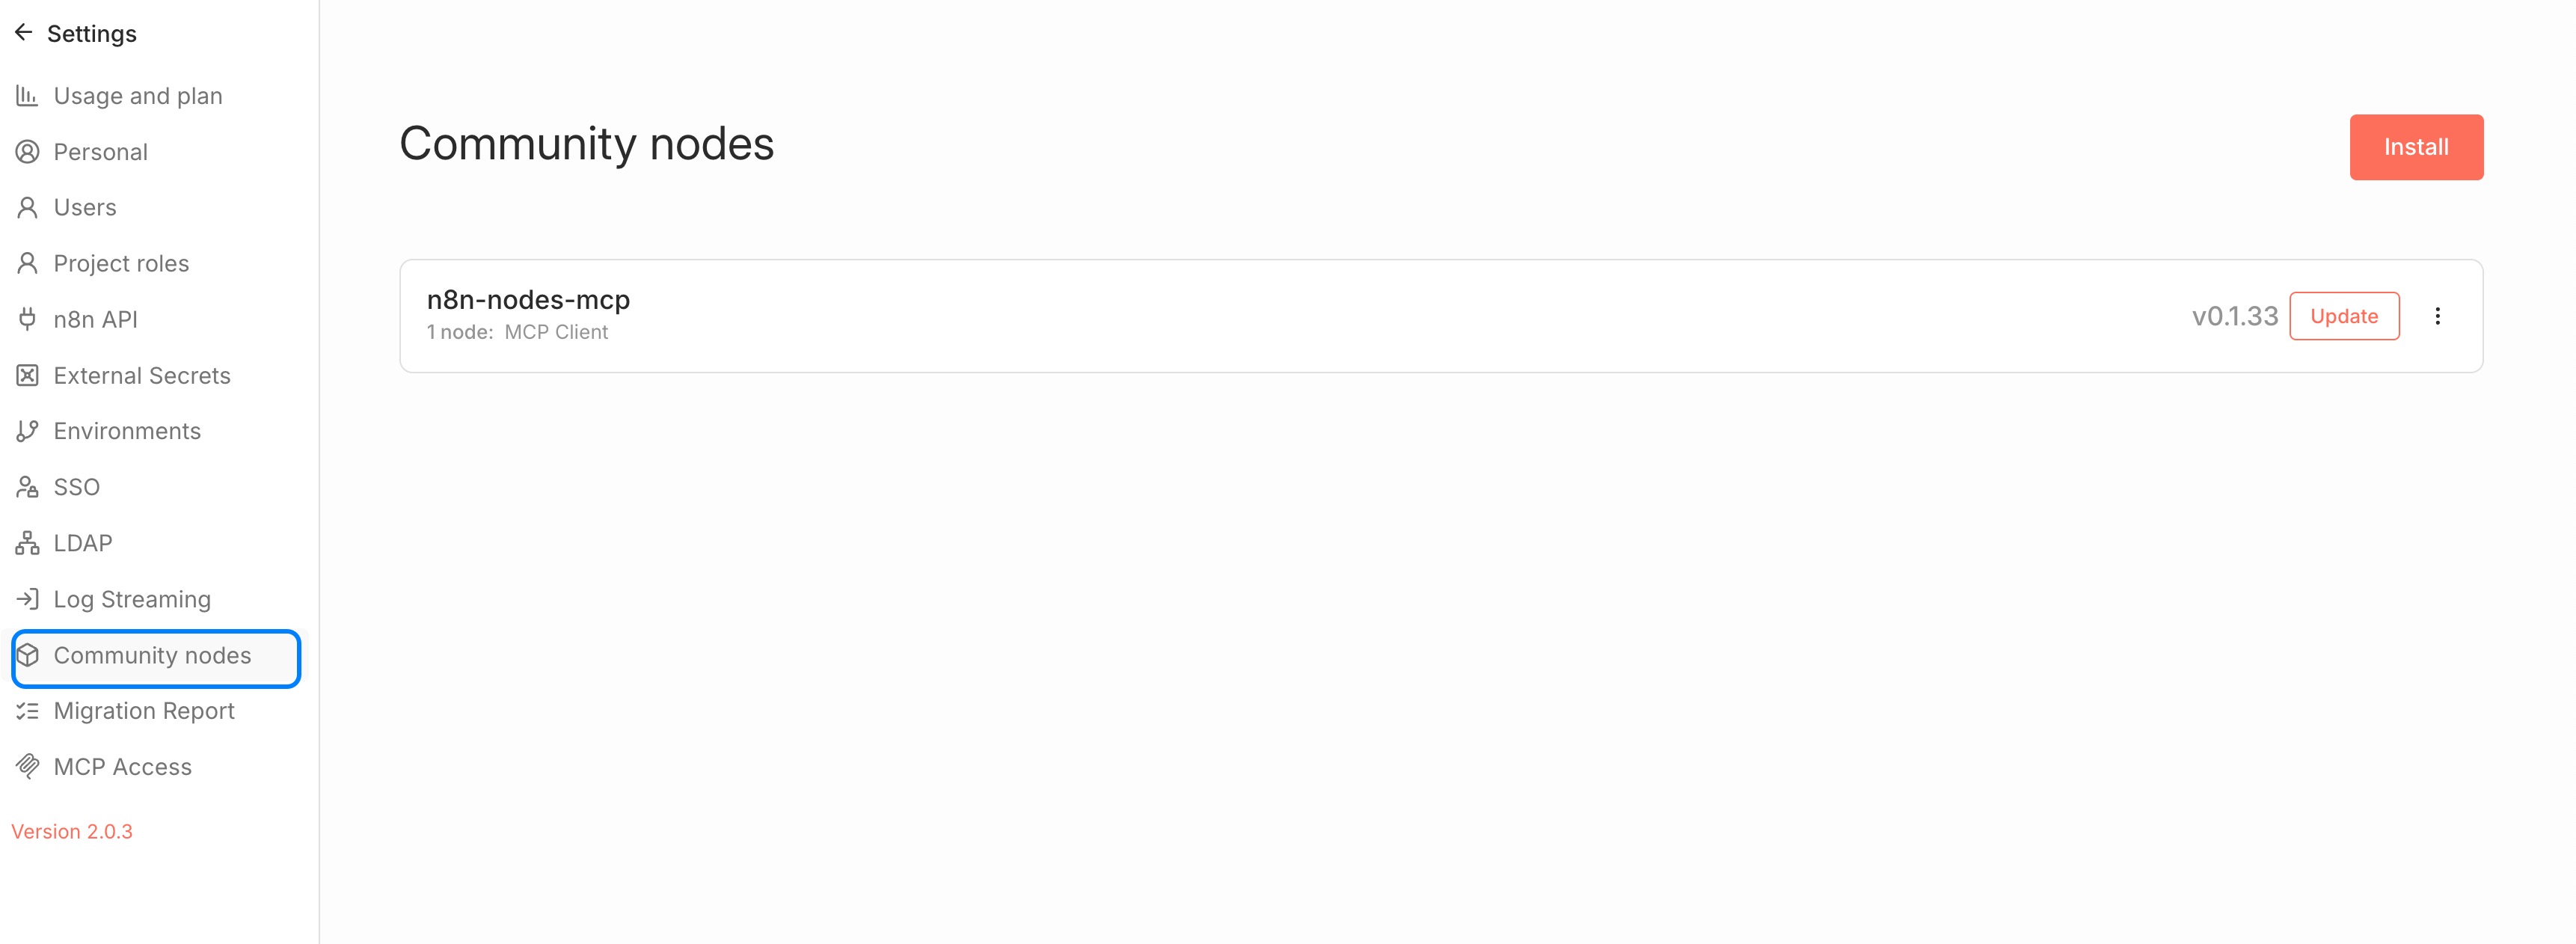
Note that a connectivity test will be performed after installation. This test will check if the account password is correct and also if N8N has the n8n-nodes-mcp plugin installed.
Sync mcp instances to the N8N credentials list
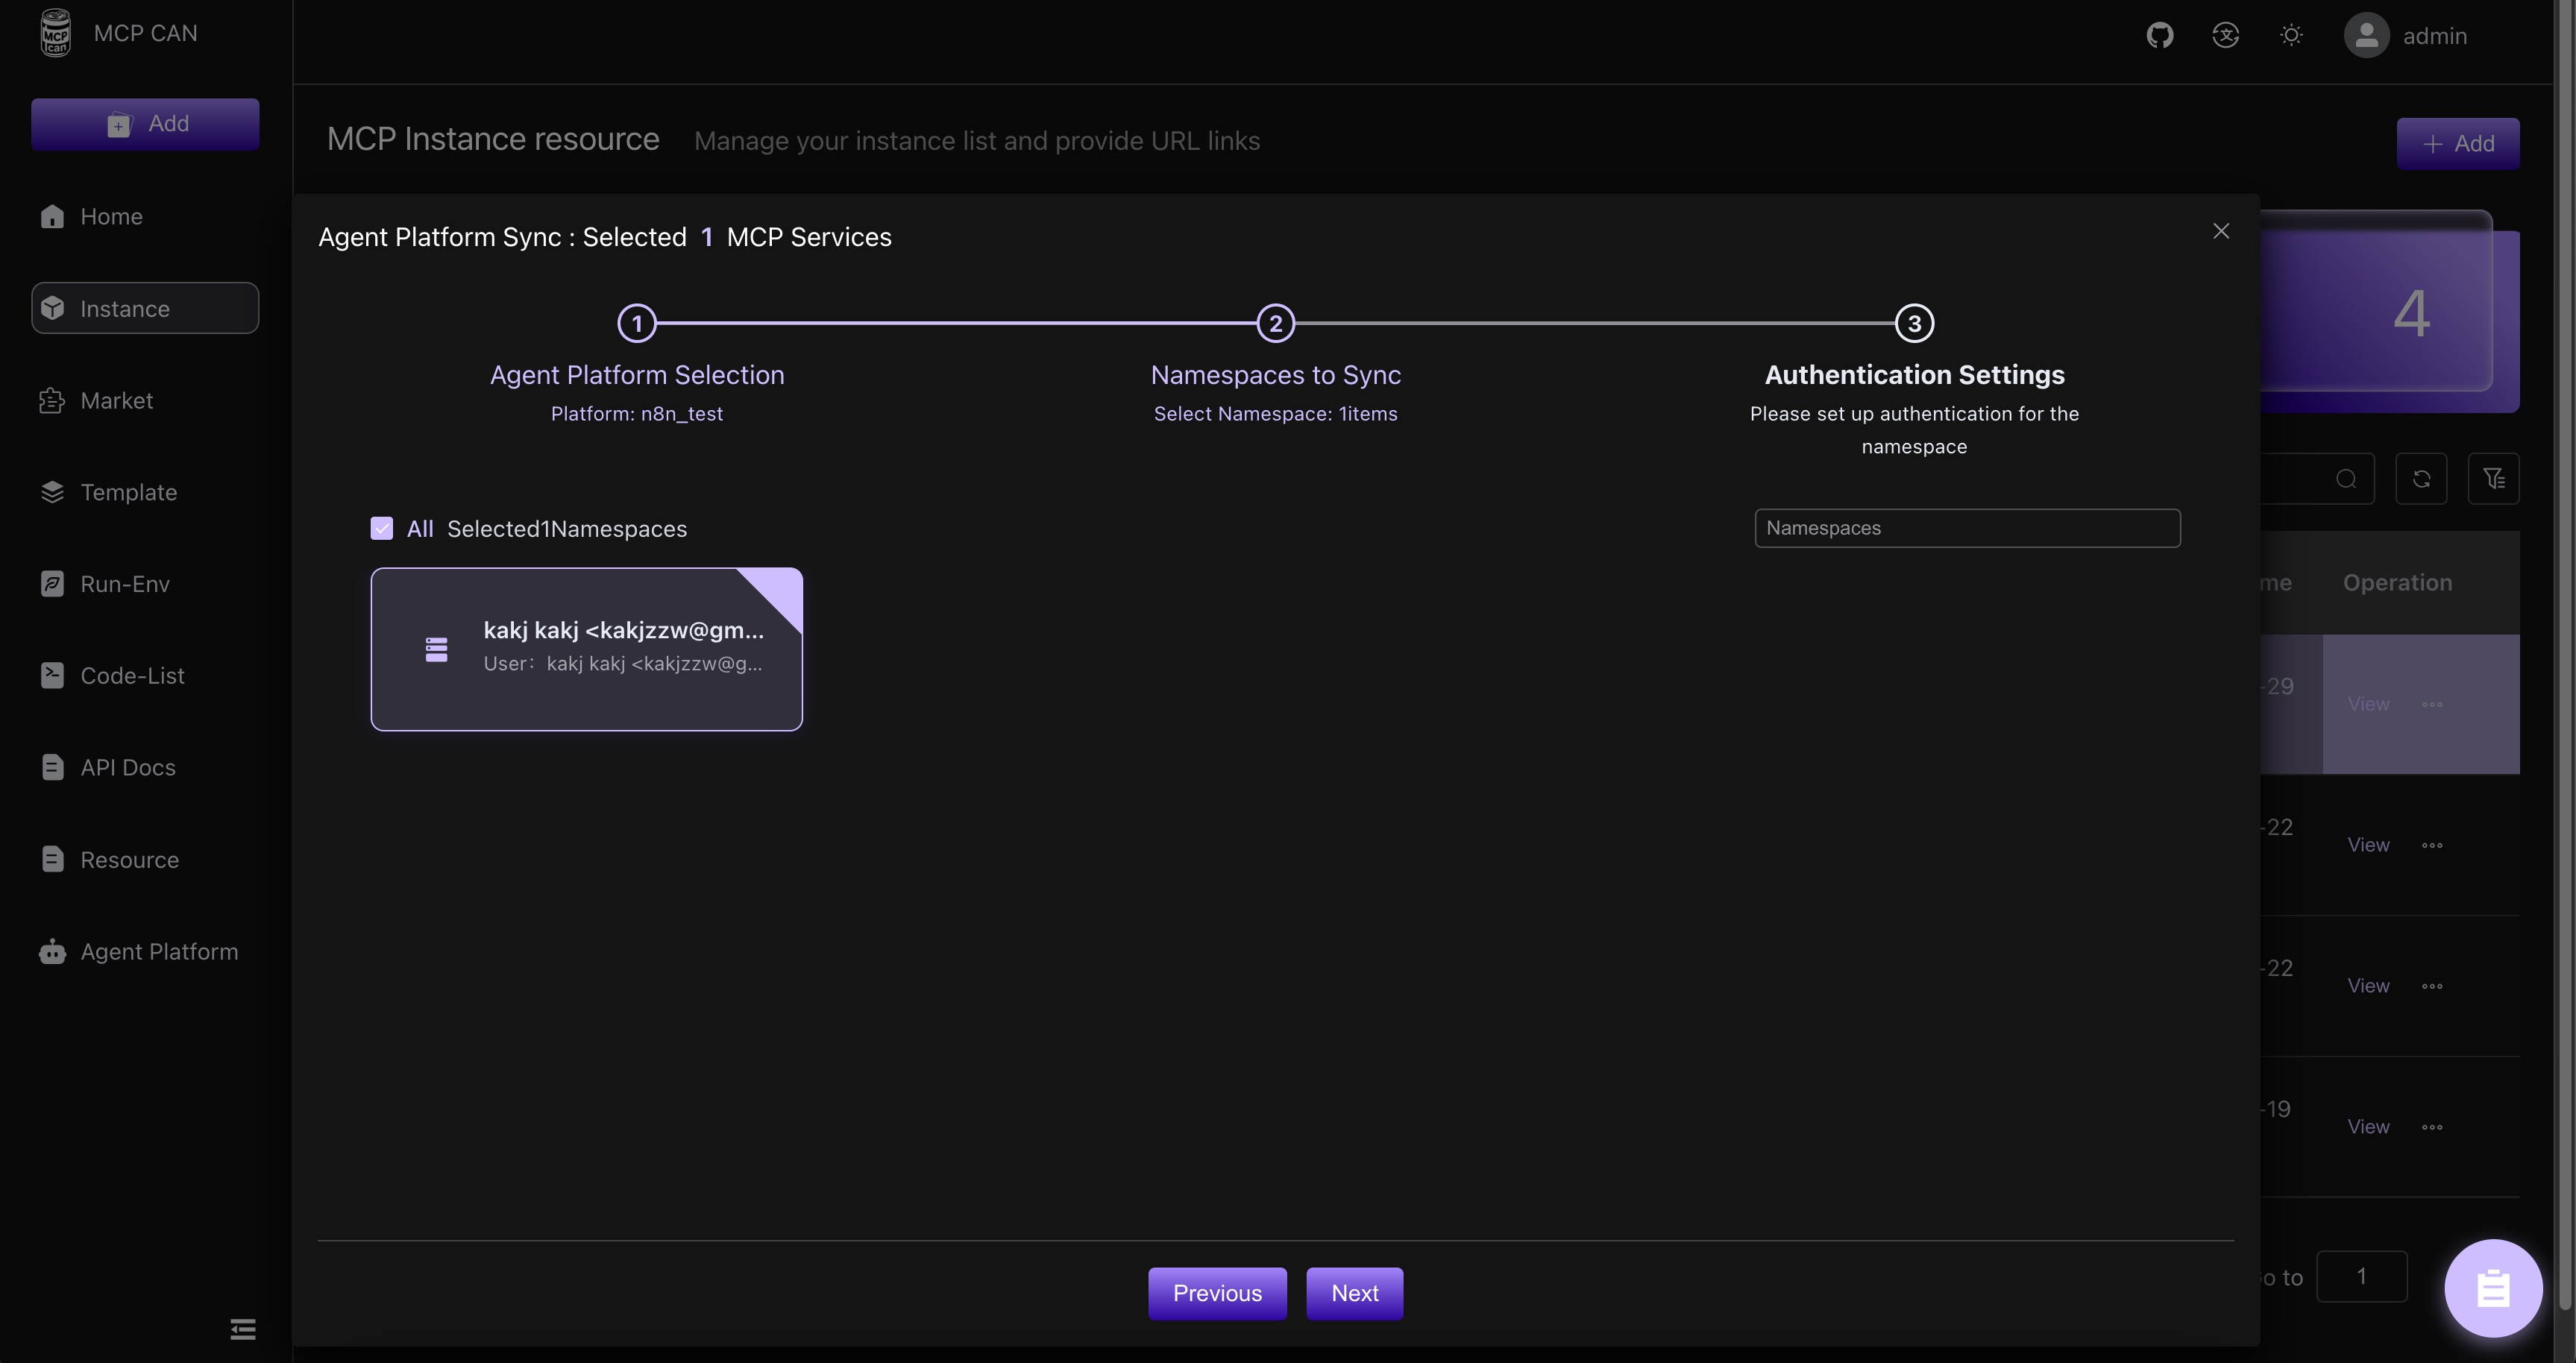
Select mcp instances to sync
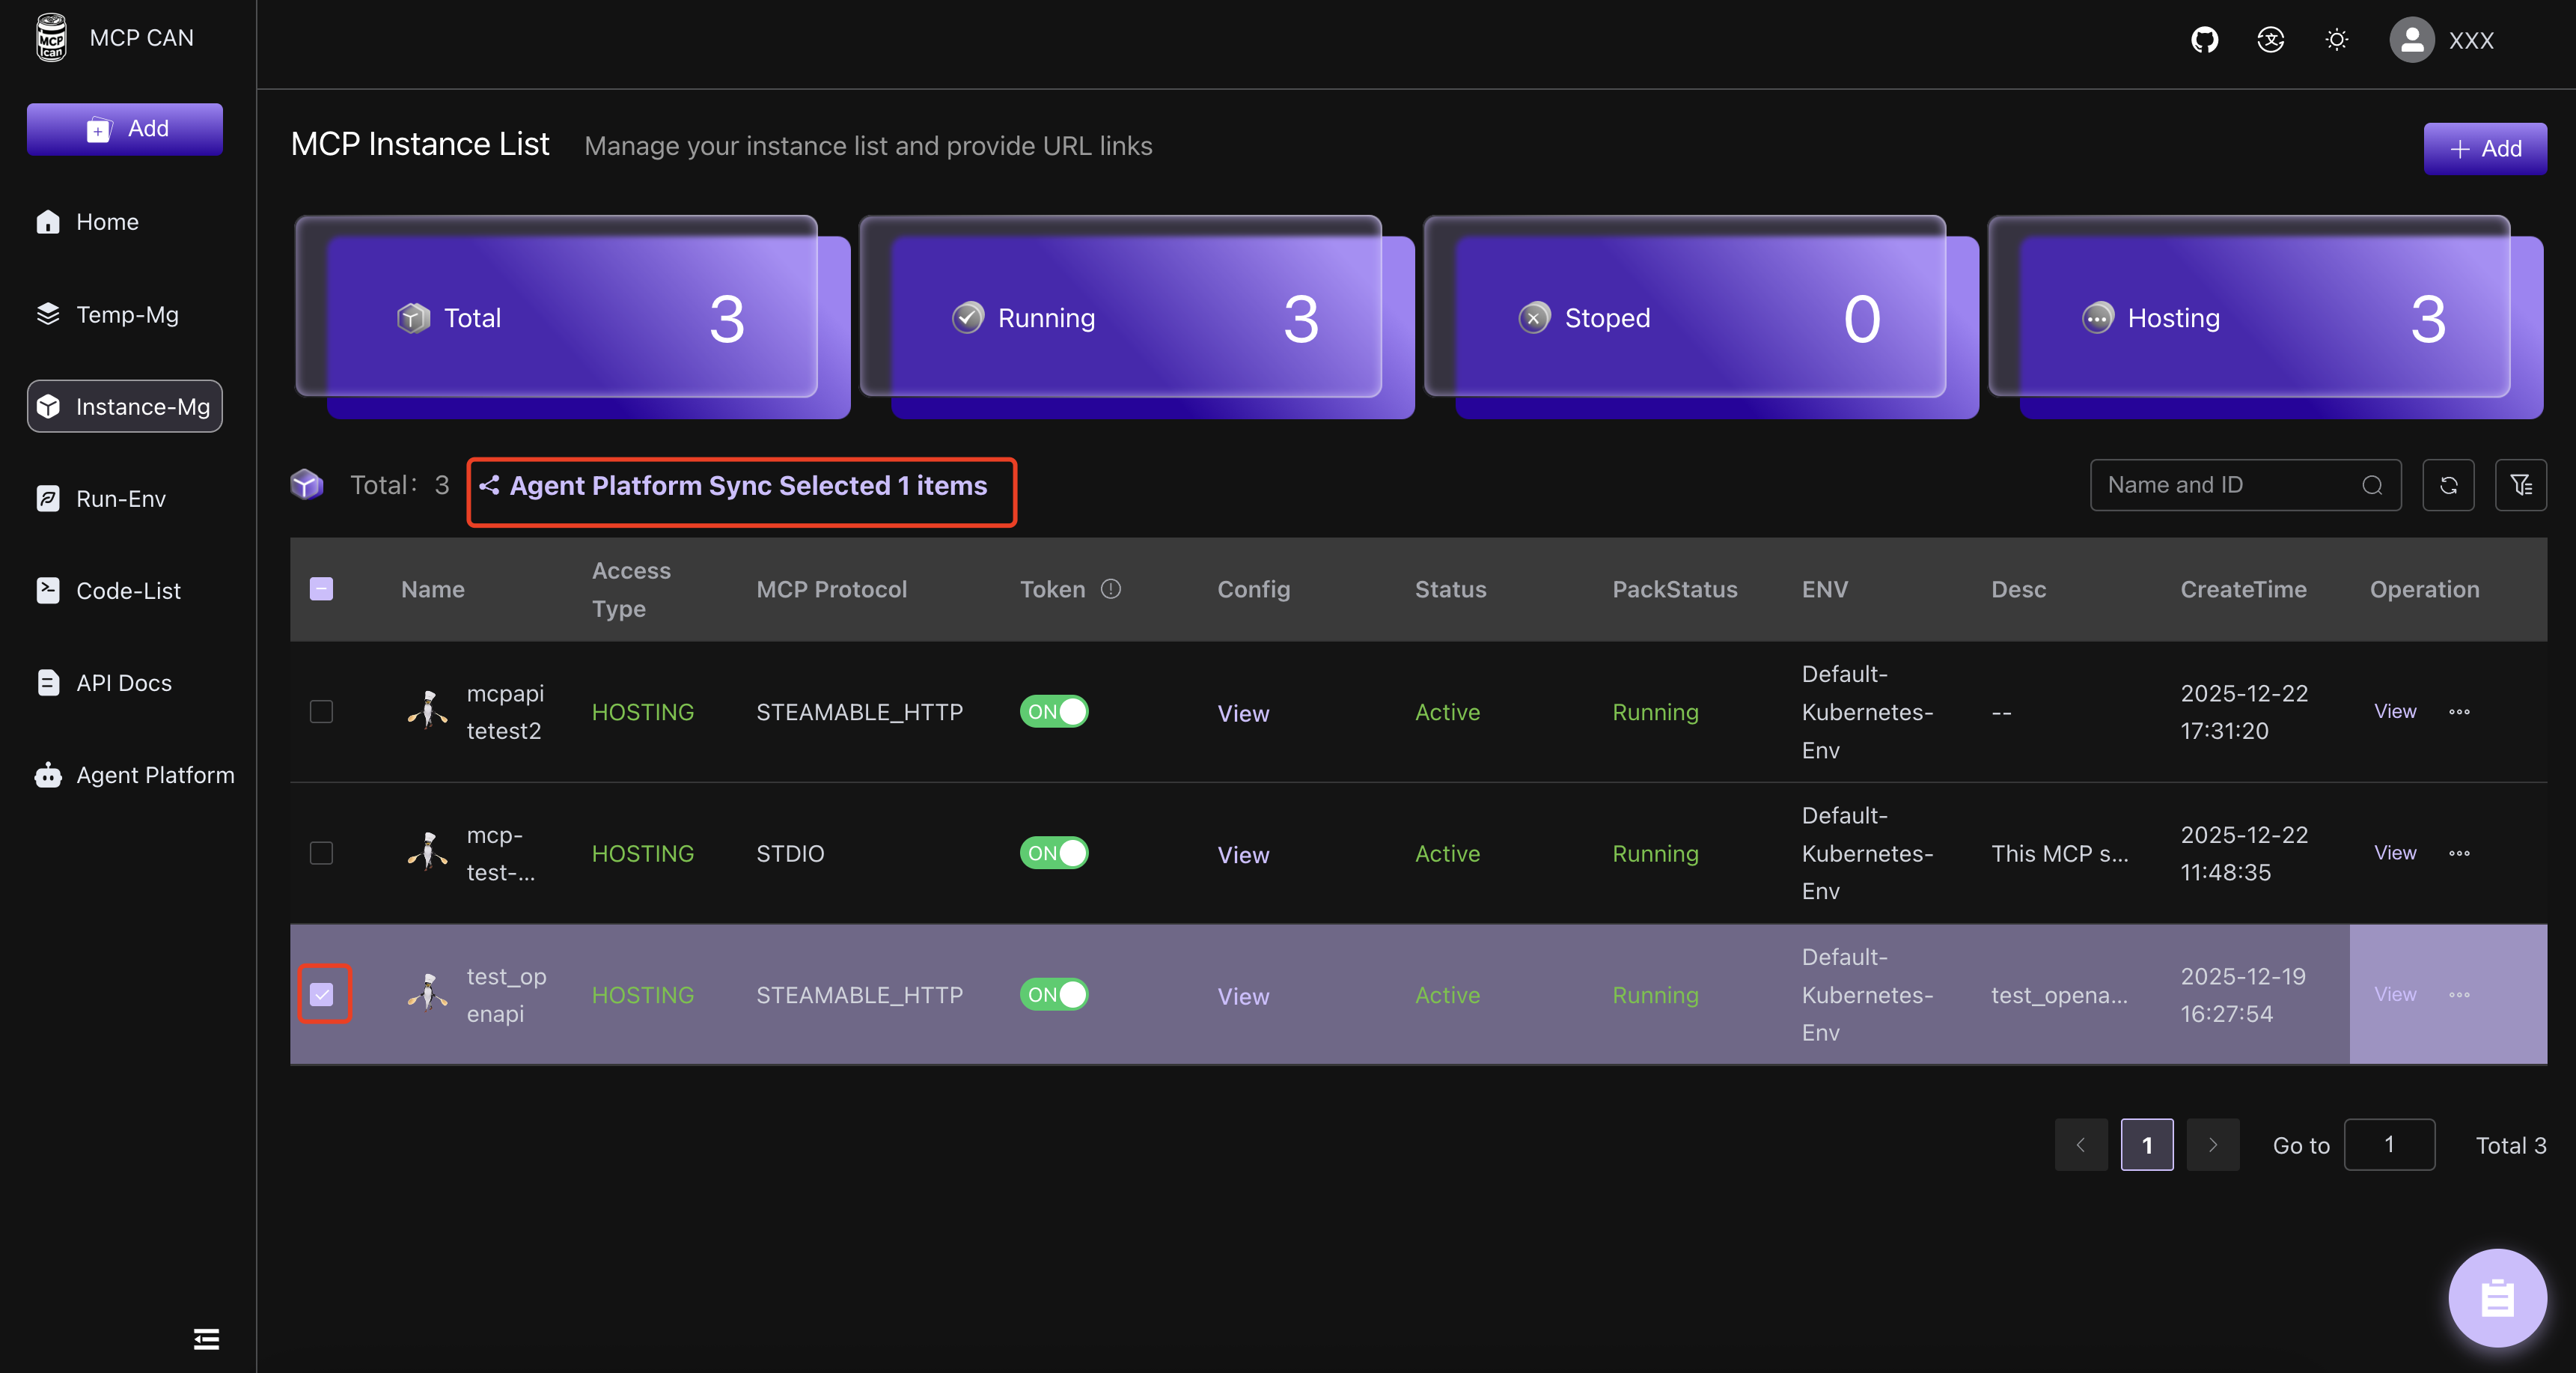
Go to the Instance Management menu, select the mcp instances to be synchronized, and click the Agent Platform Sync button.
Select the newly created N8N Agent Platform
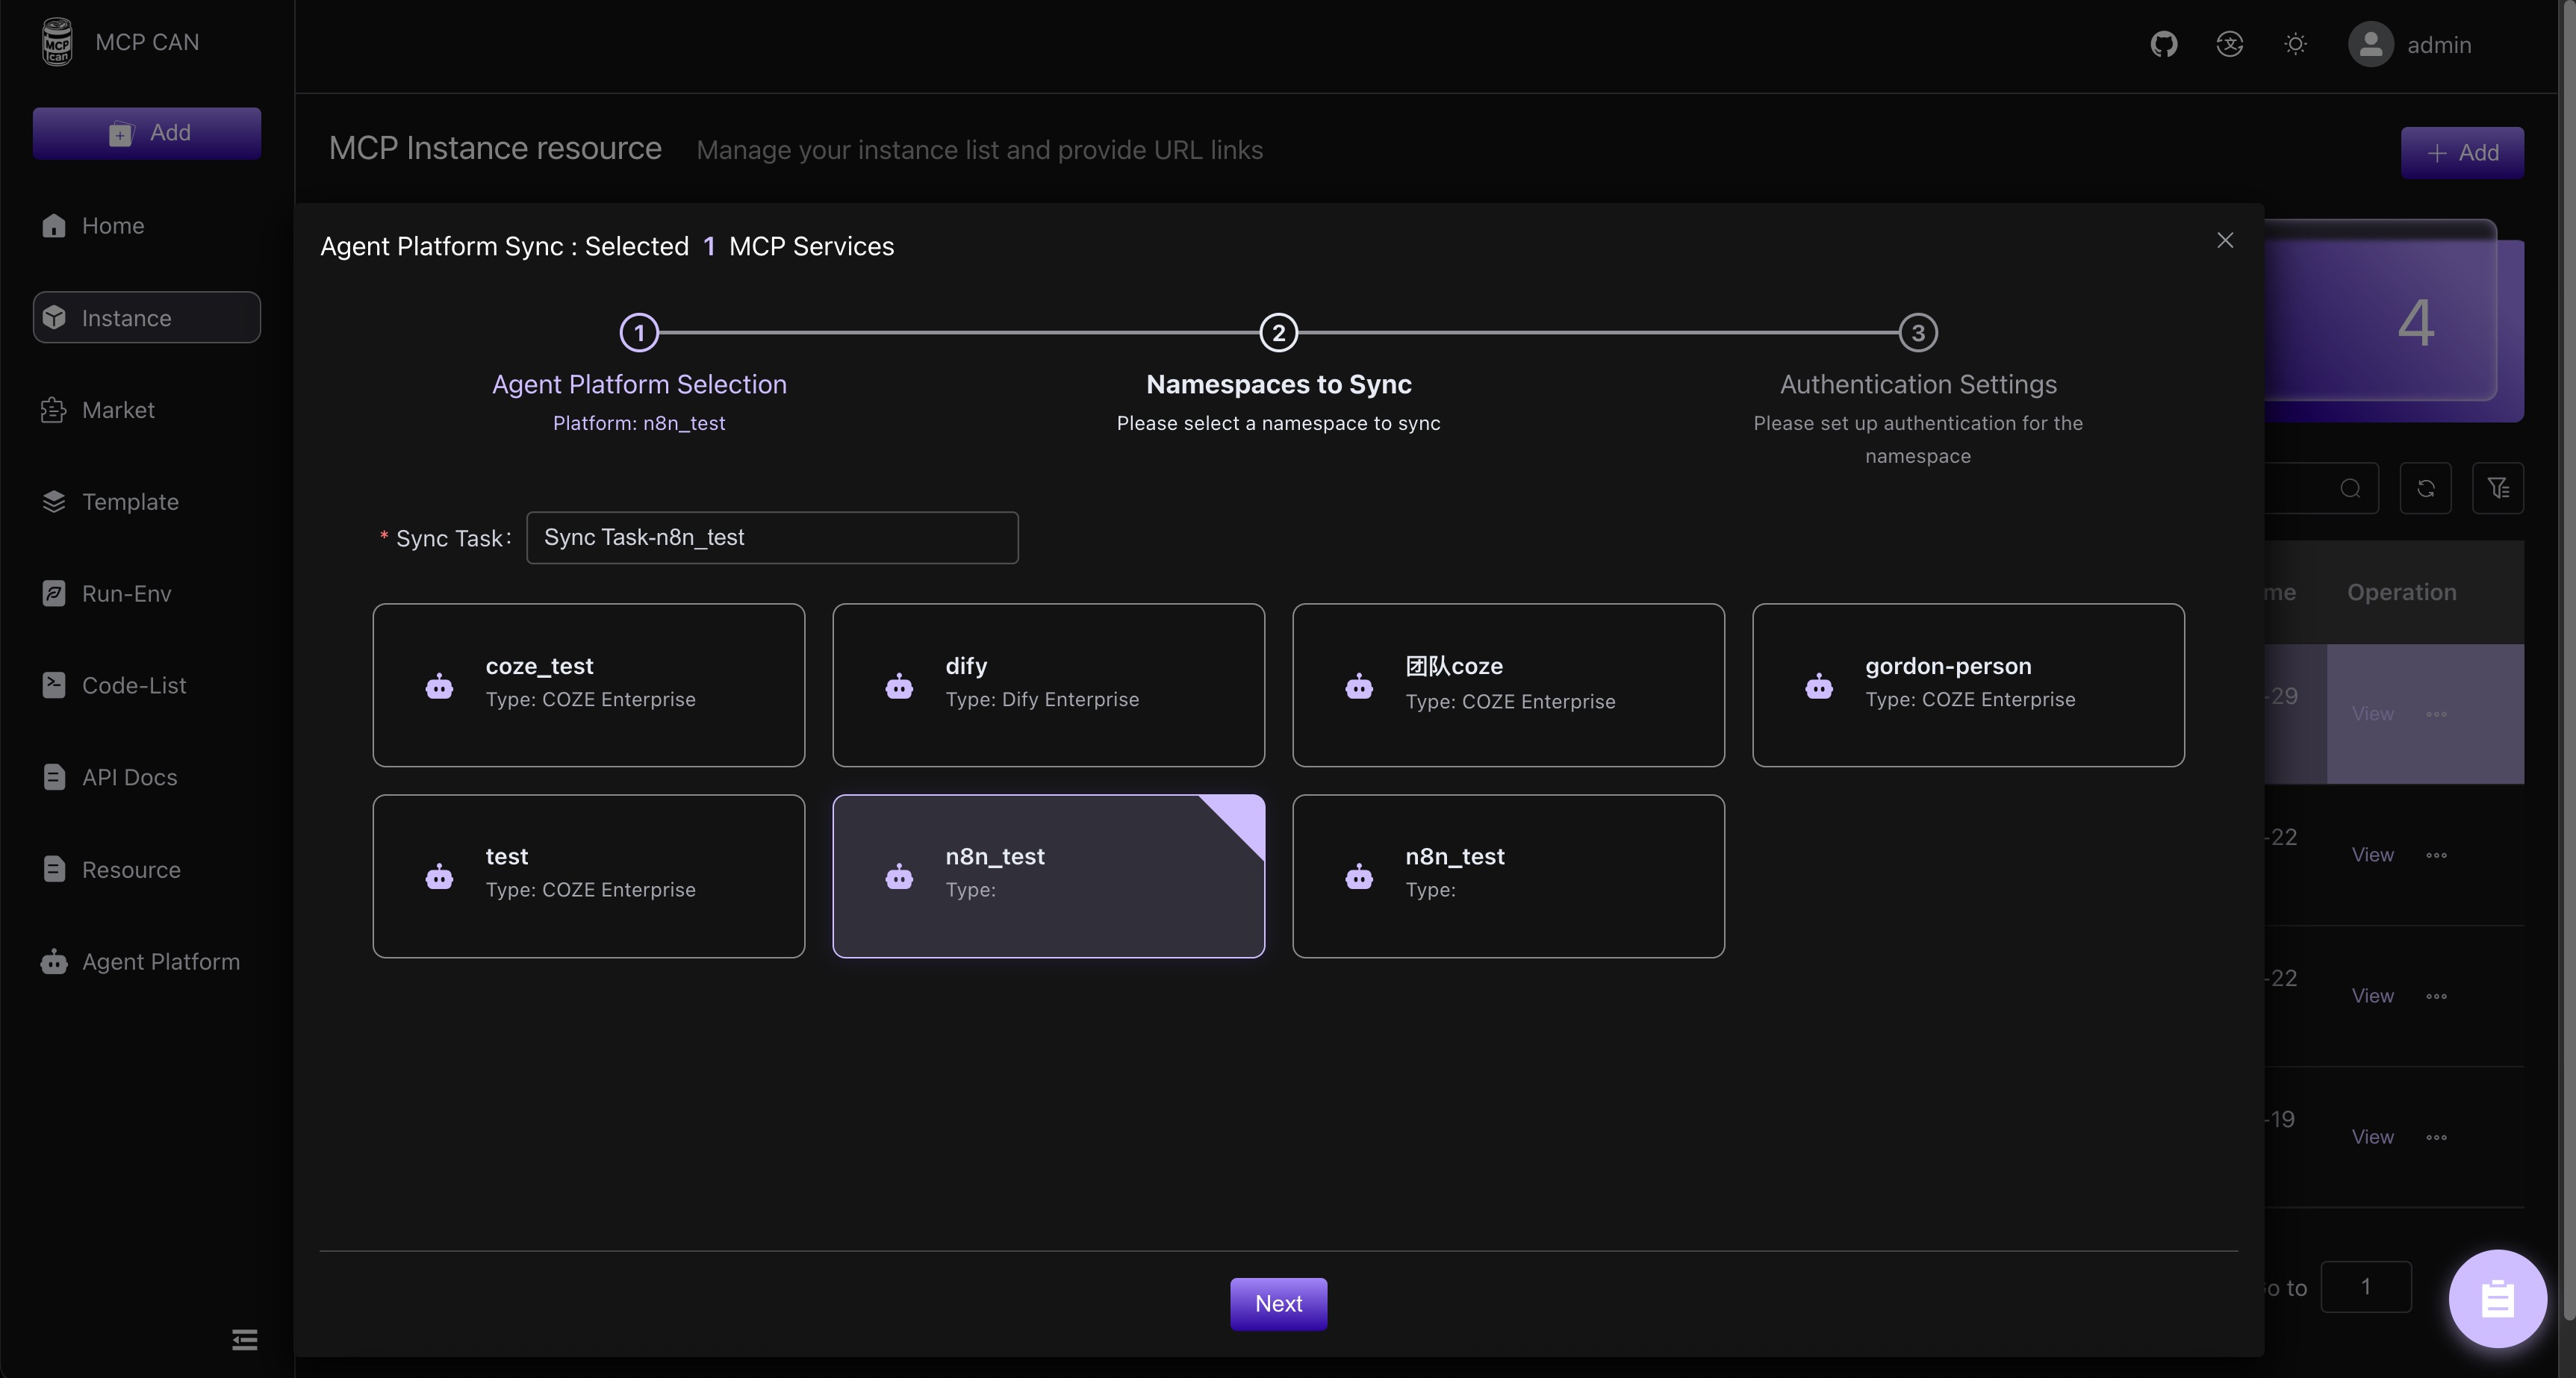
Select the projects in N8N that need to be synchronized
Set the pass-through headers for each project when accessed via mcpcan proxy
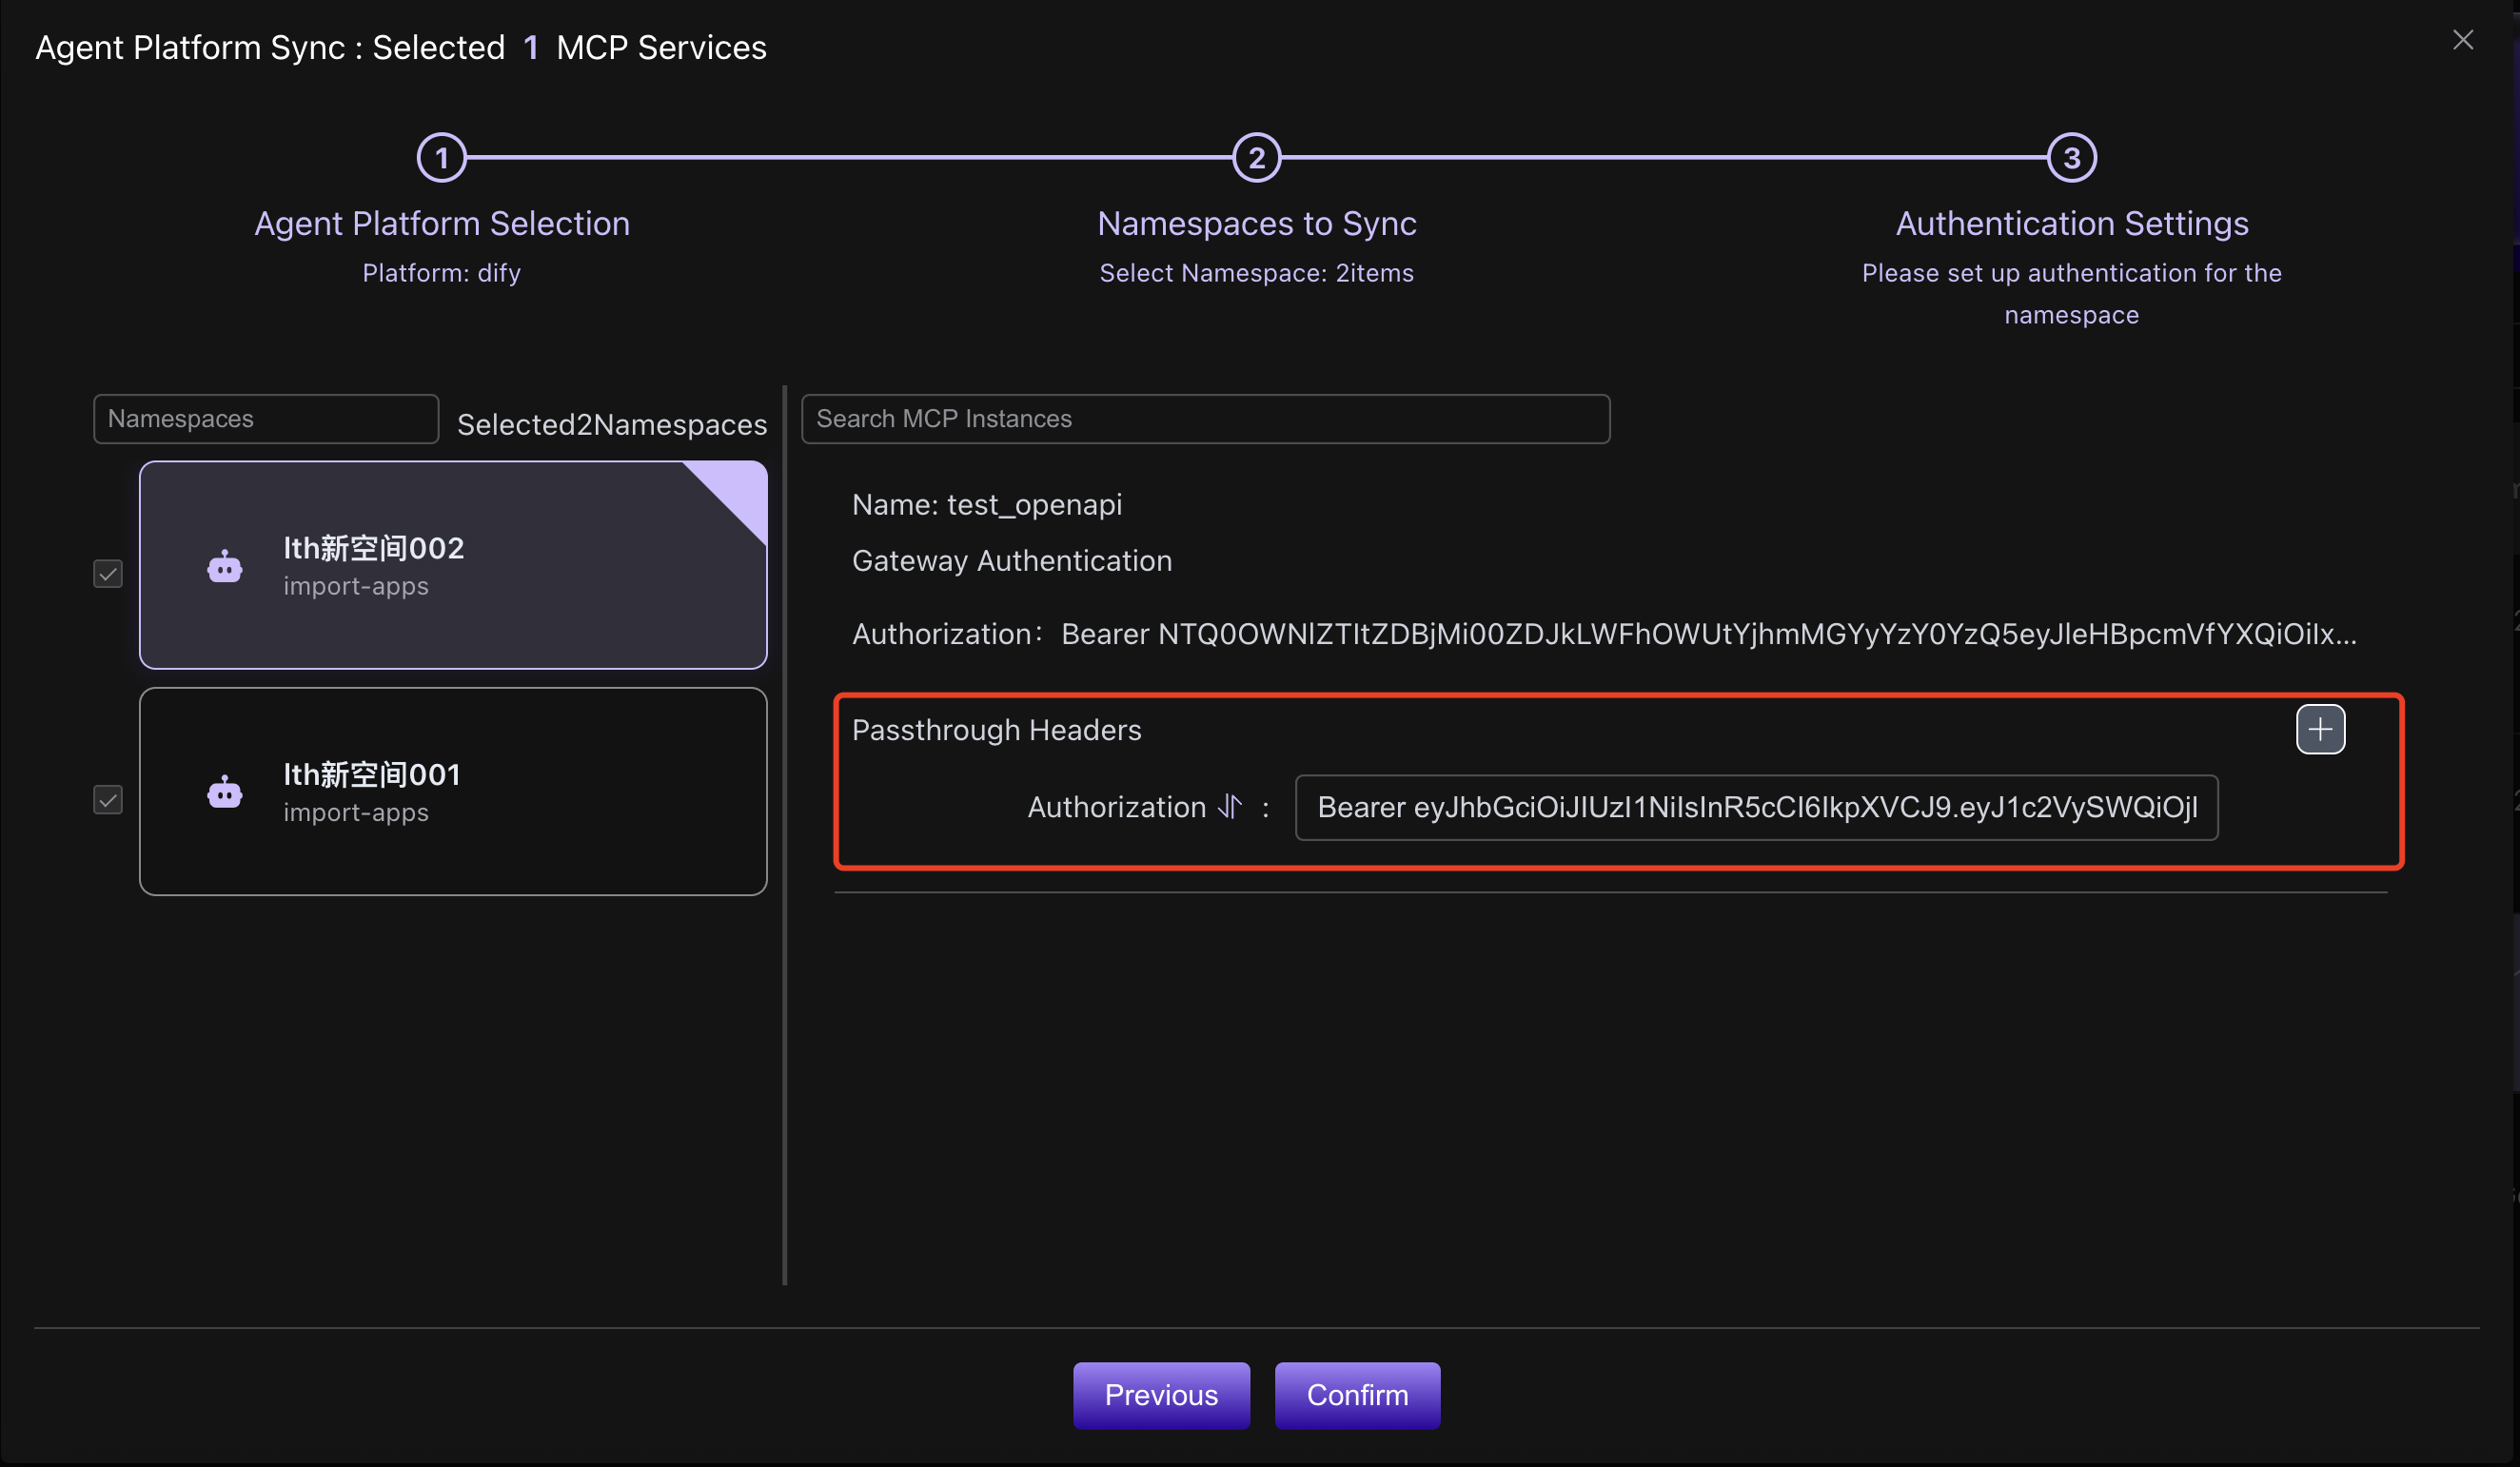
mcpcan will initialize an authorization credential for each project by default. This credential will be passed through when mcpcan proxies access to N8N.
The gateway authentication's Authorization will be synchronized to the header of the N8N mcp plugin, while the pass-through headers will be passed to the actual mcp server after mcpcan receives the proxy request.
mcpcan will initialize different gateway authentication Authorizations for each space. The pass-through headers will use the default pass-through headers from the instance's
MCP Access Configuration.
After enabling synchronization, check the sync status and error messages
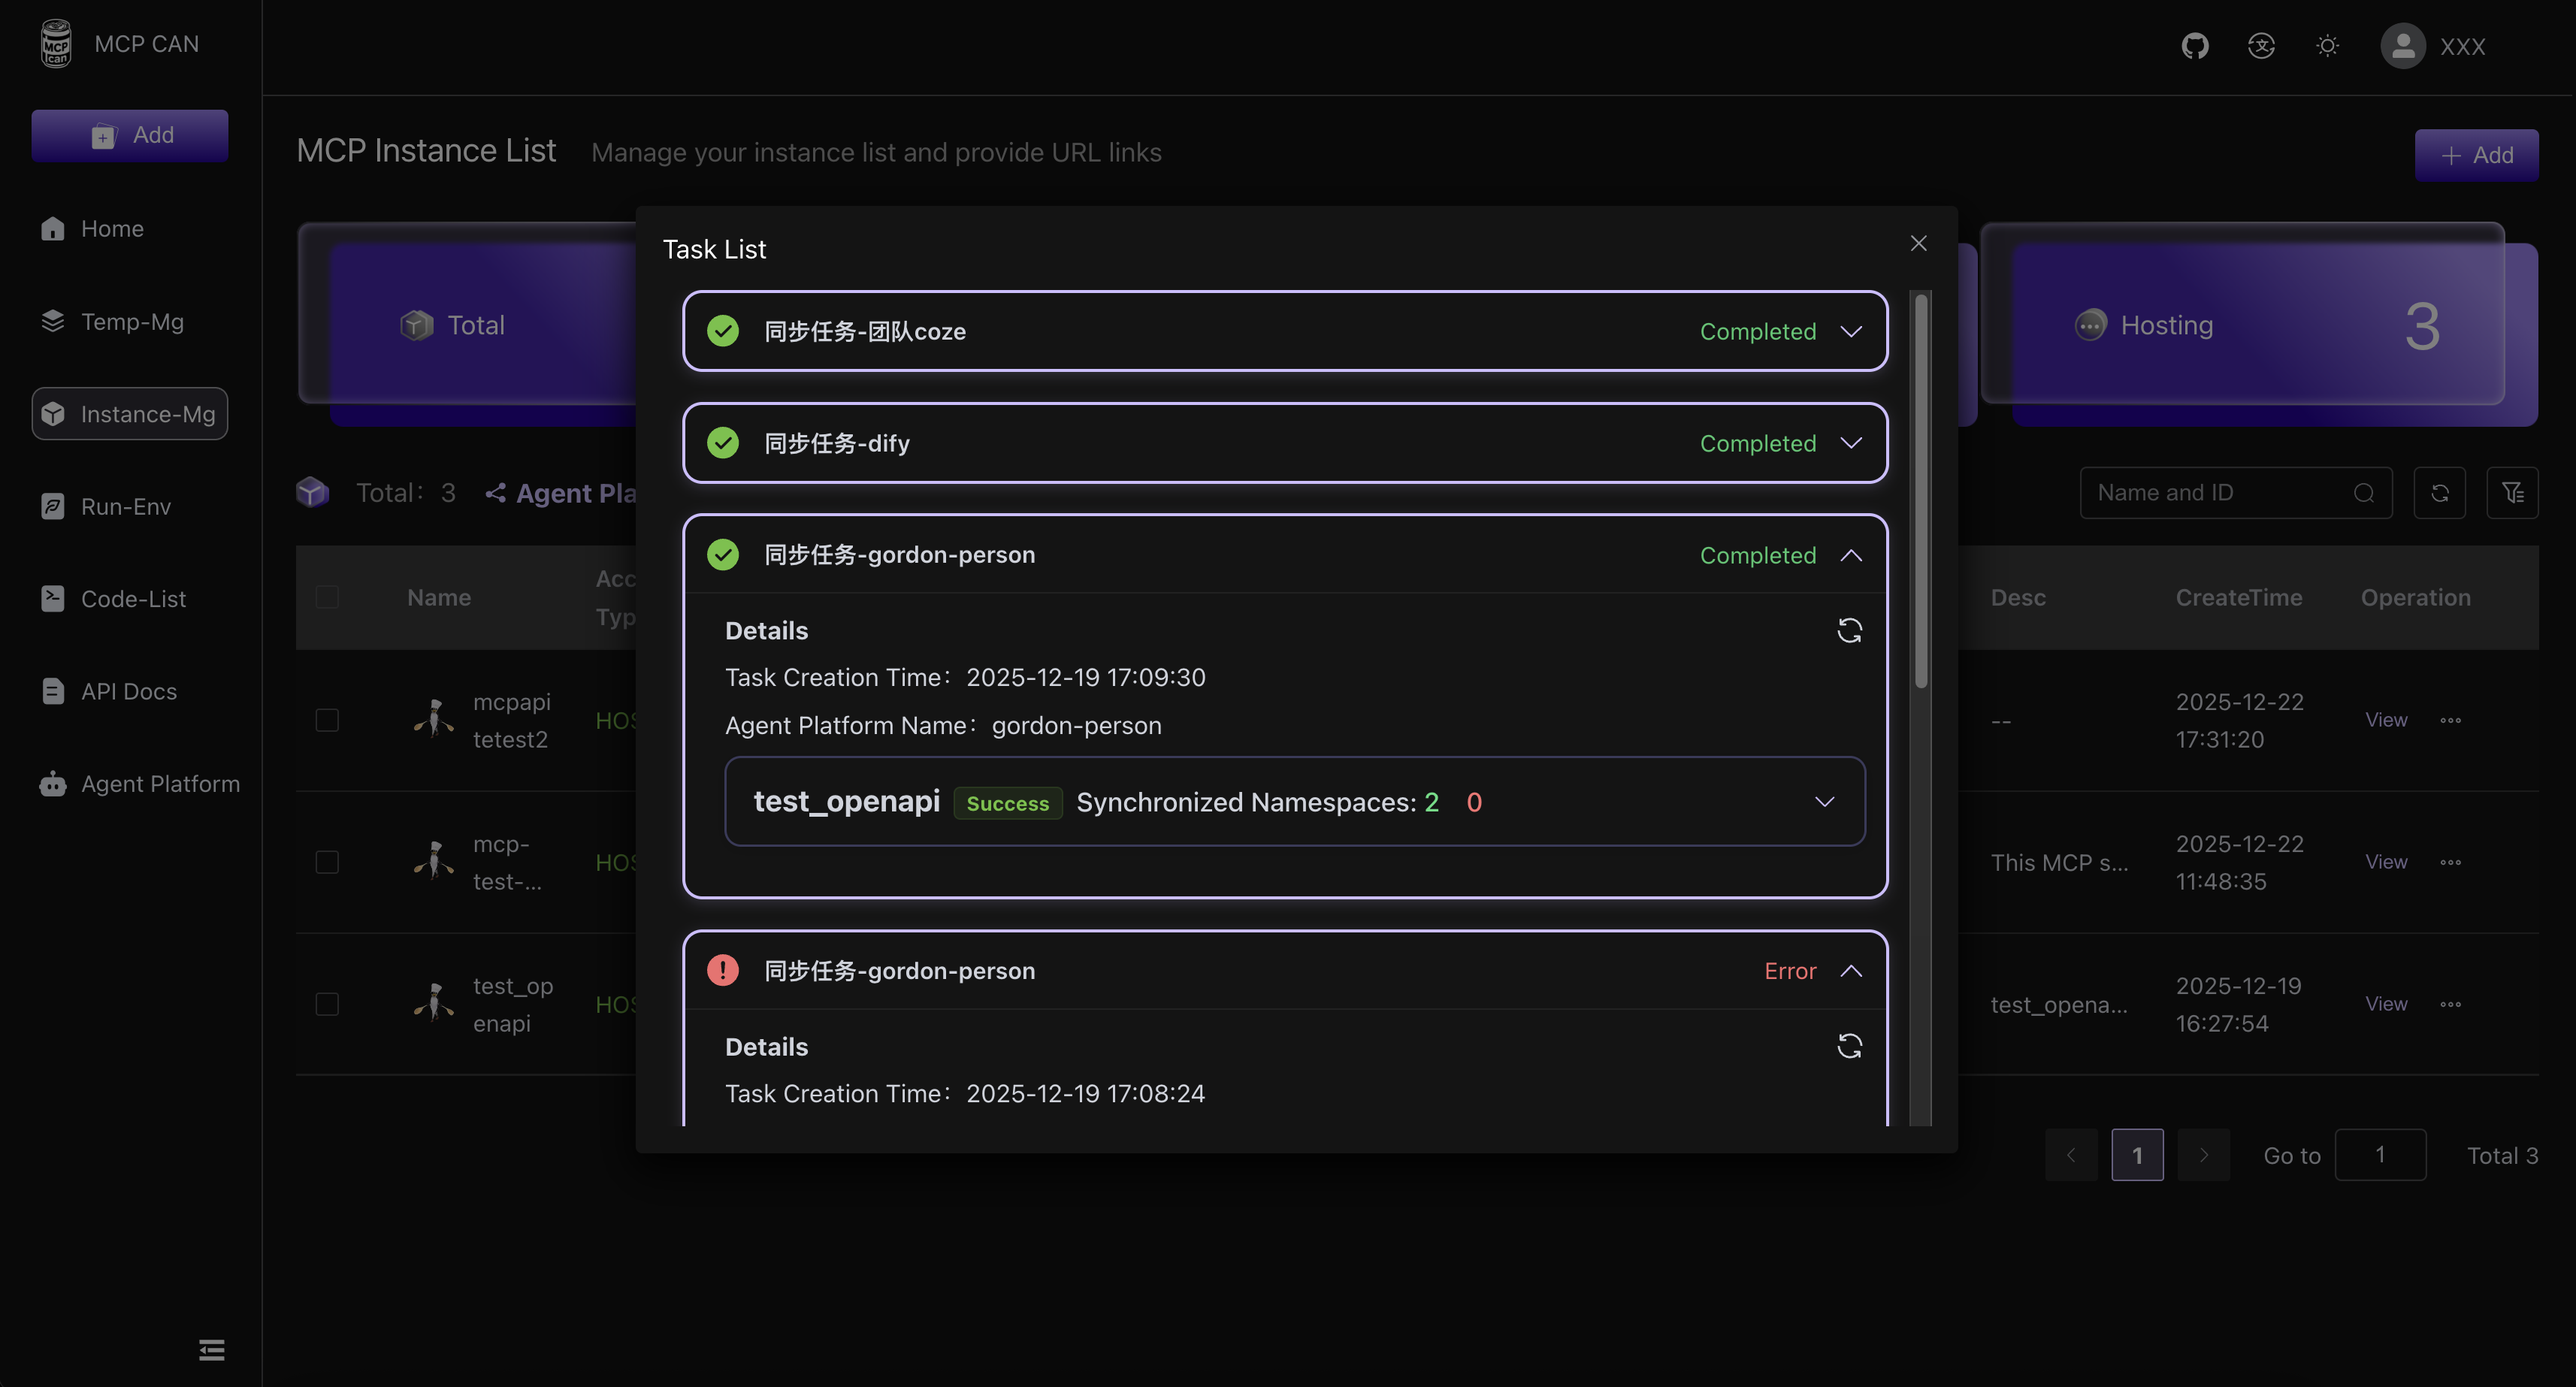
After confirming synchronization, a sync status page will pop up. This page allows you to view the sync status and error messages for each instance of each project.
Manage authorization for each project in Instance Management
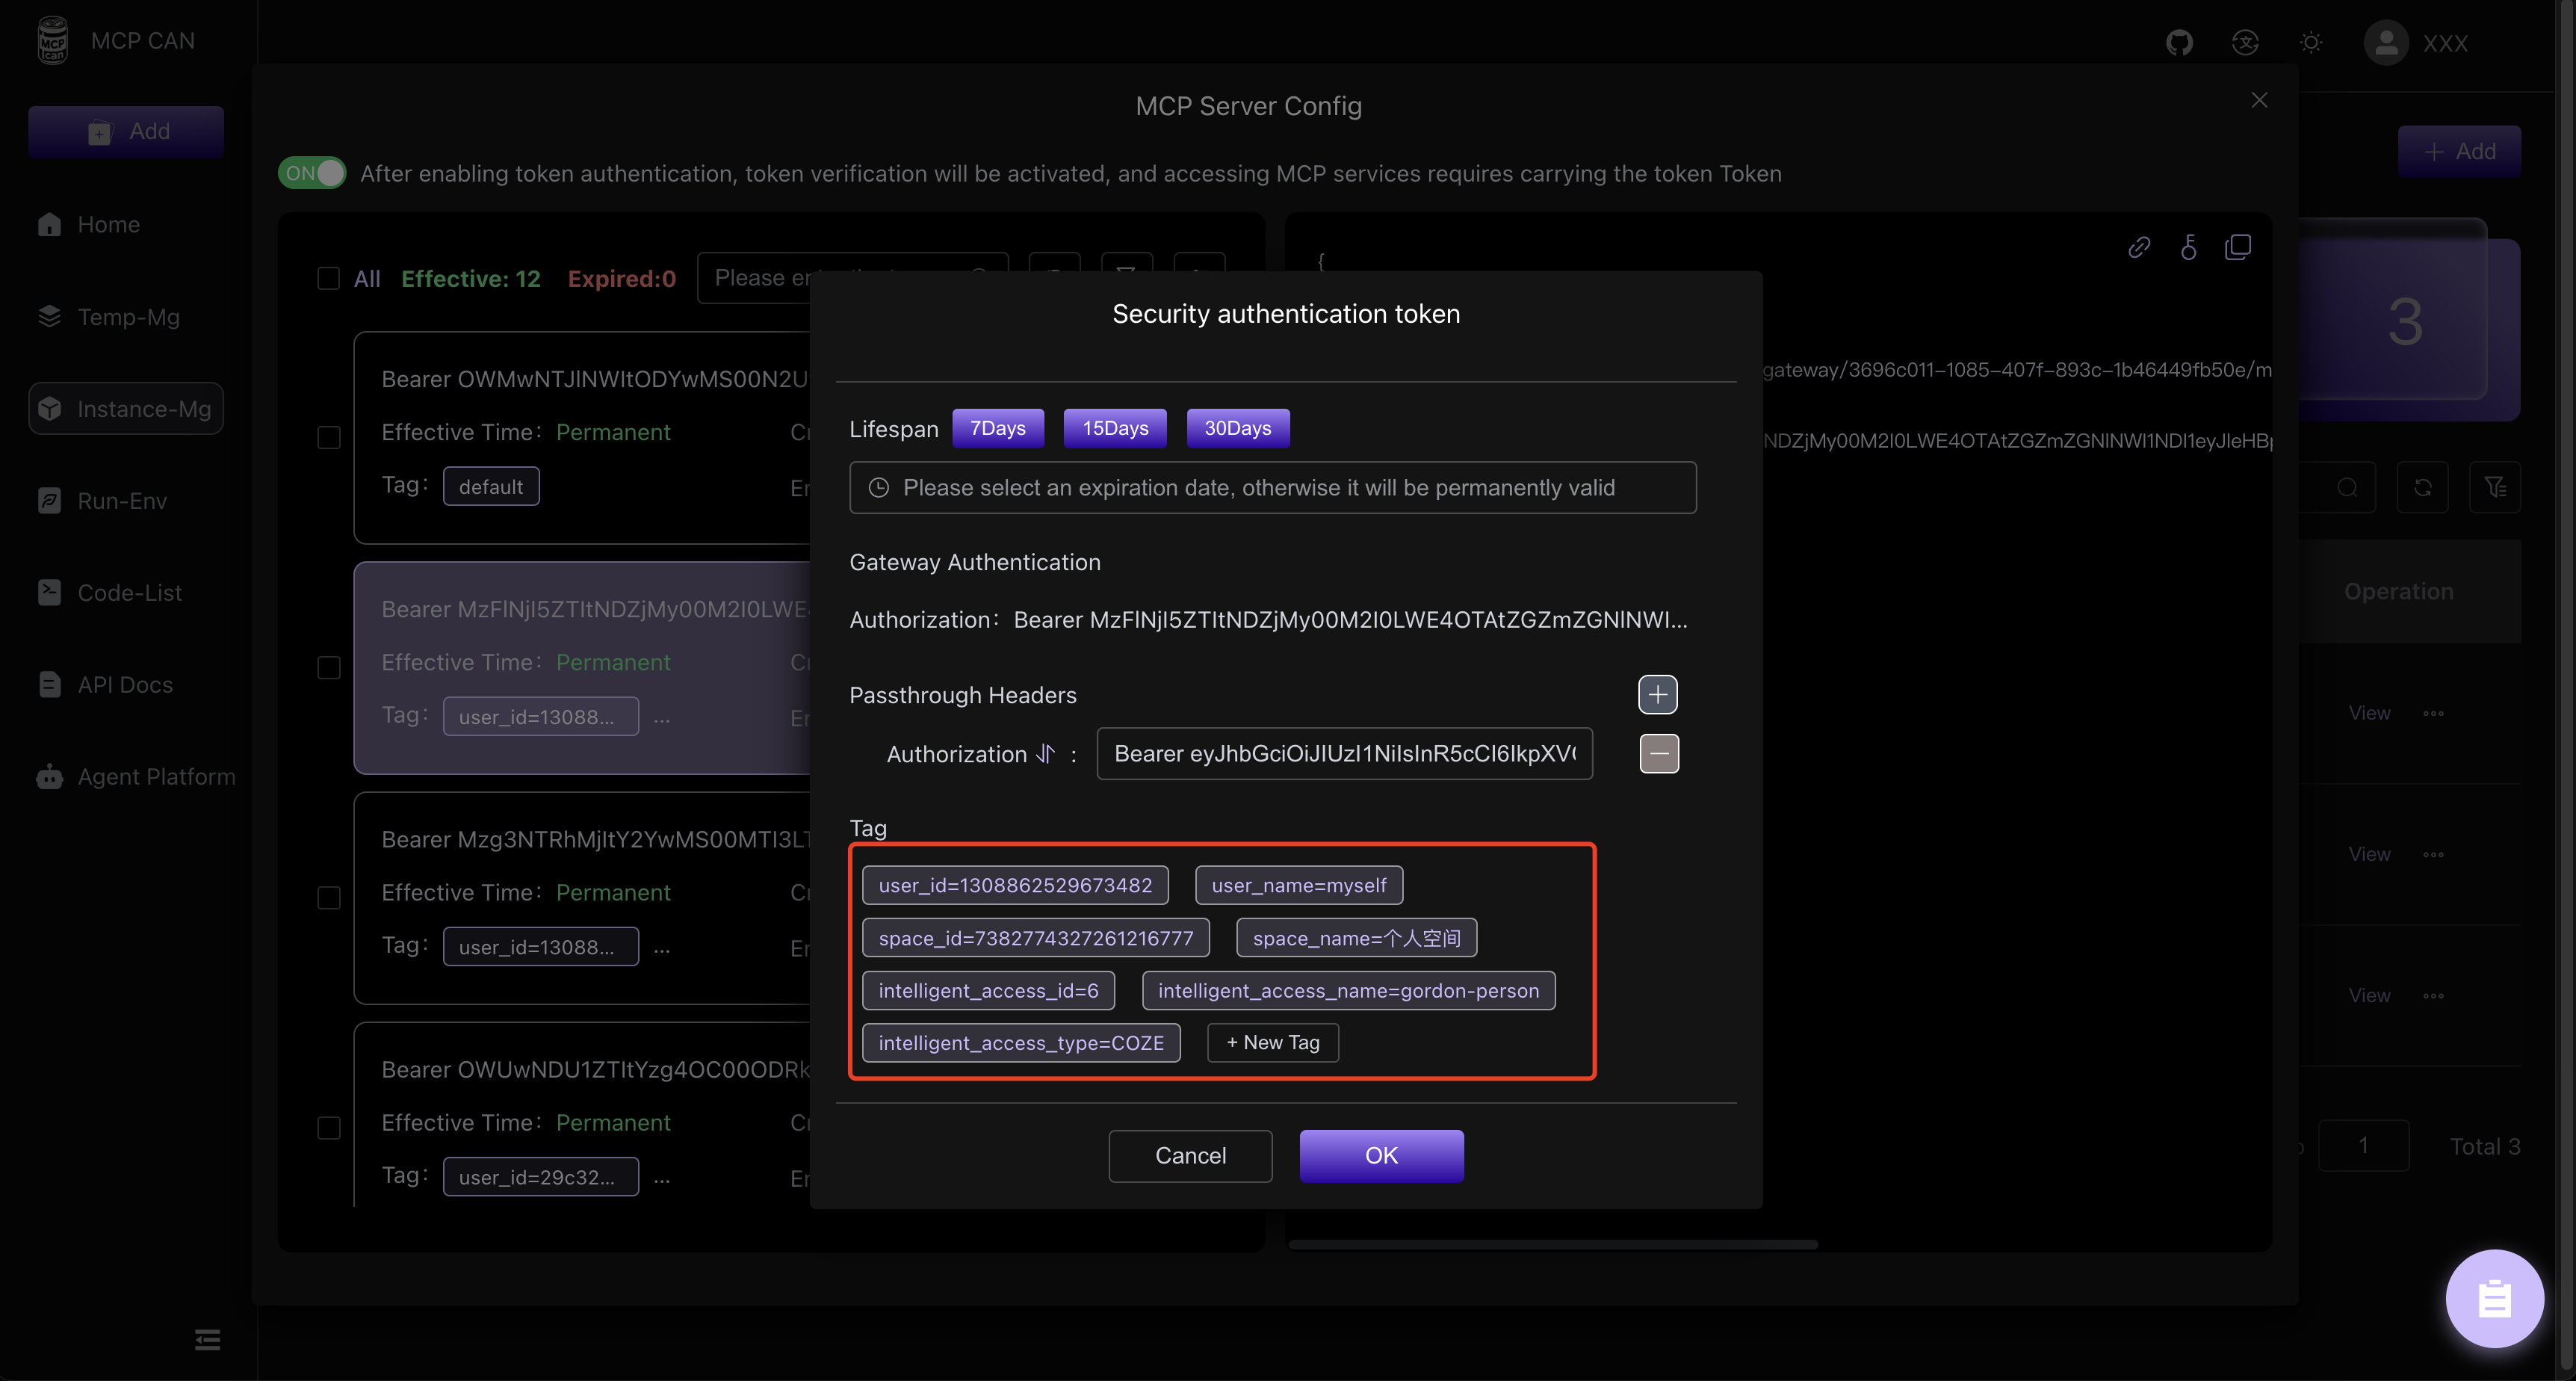
[Instance Management] -> [MCP Access Configuration]
In MCP Access Configuration, you can view the authorization information for each space, modify the pass-through headers, and decide whether to disable authorization access for a specific space.