Sync mcpcan instance to COZE plugin
Create COZE Agent Platform
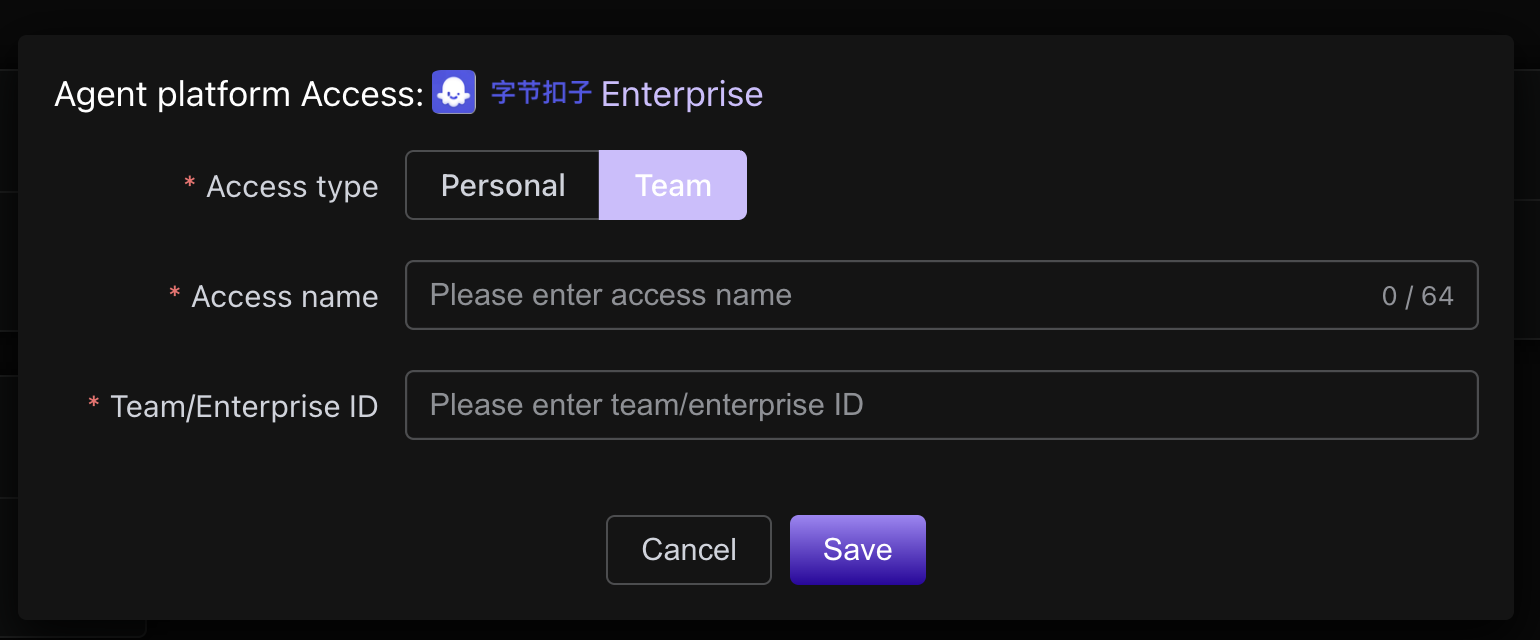
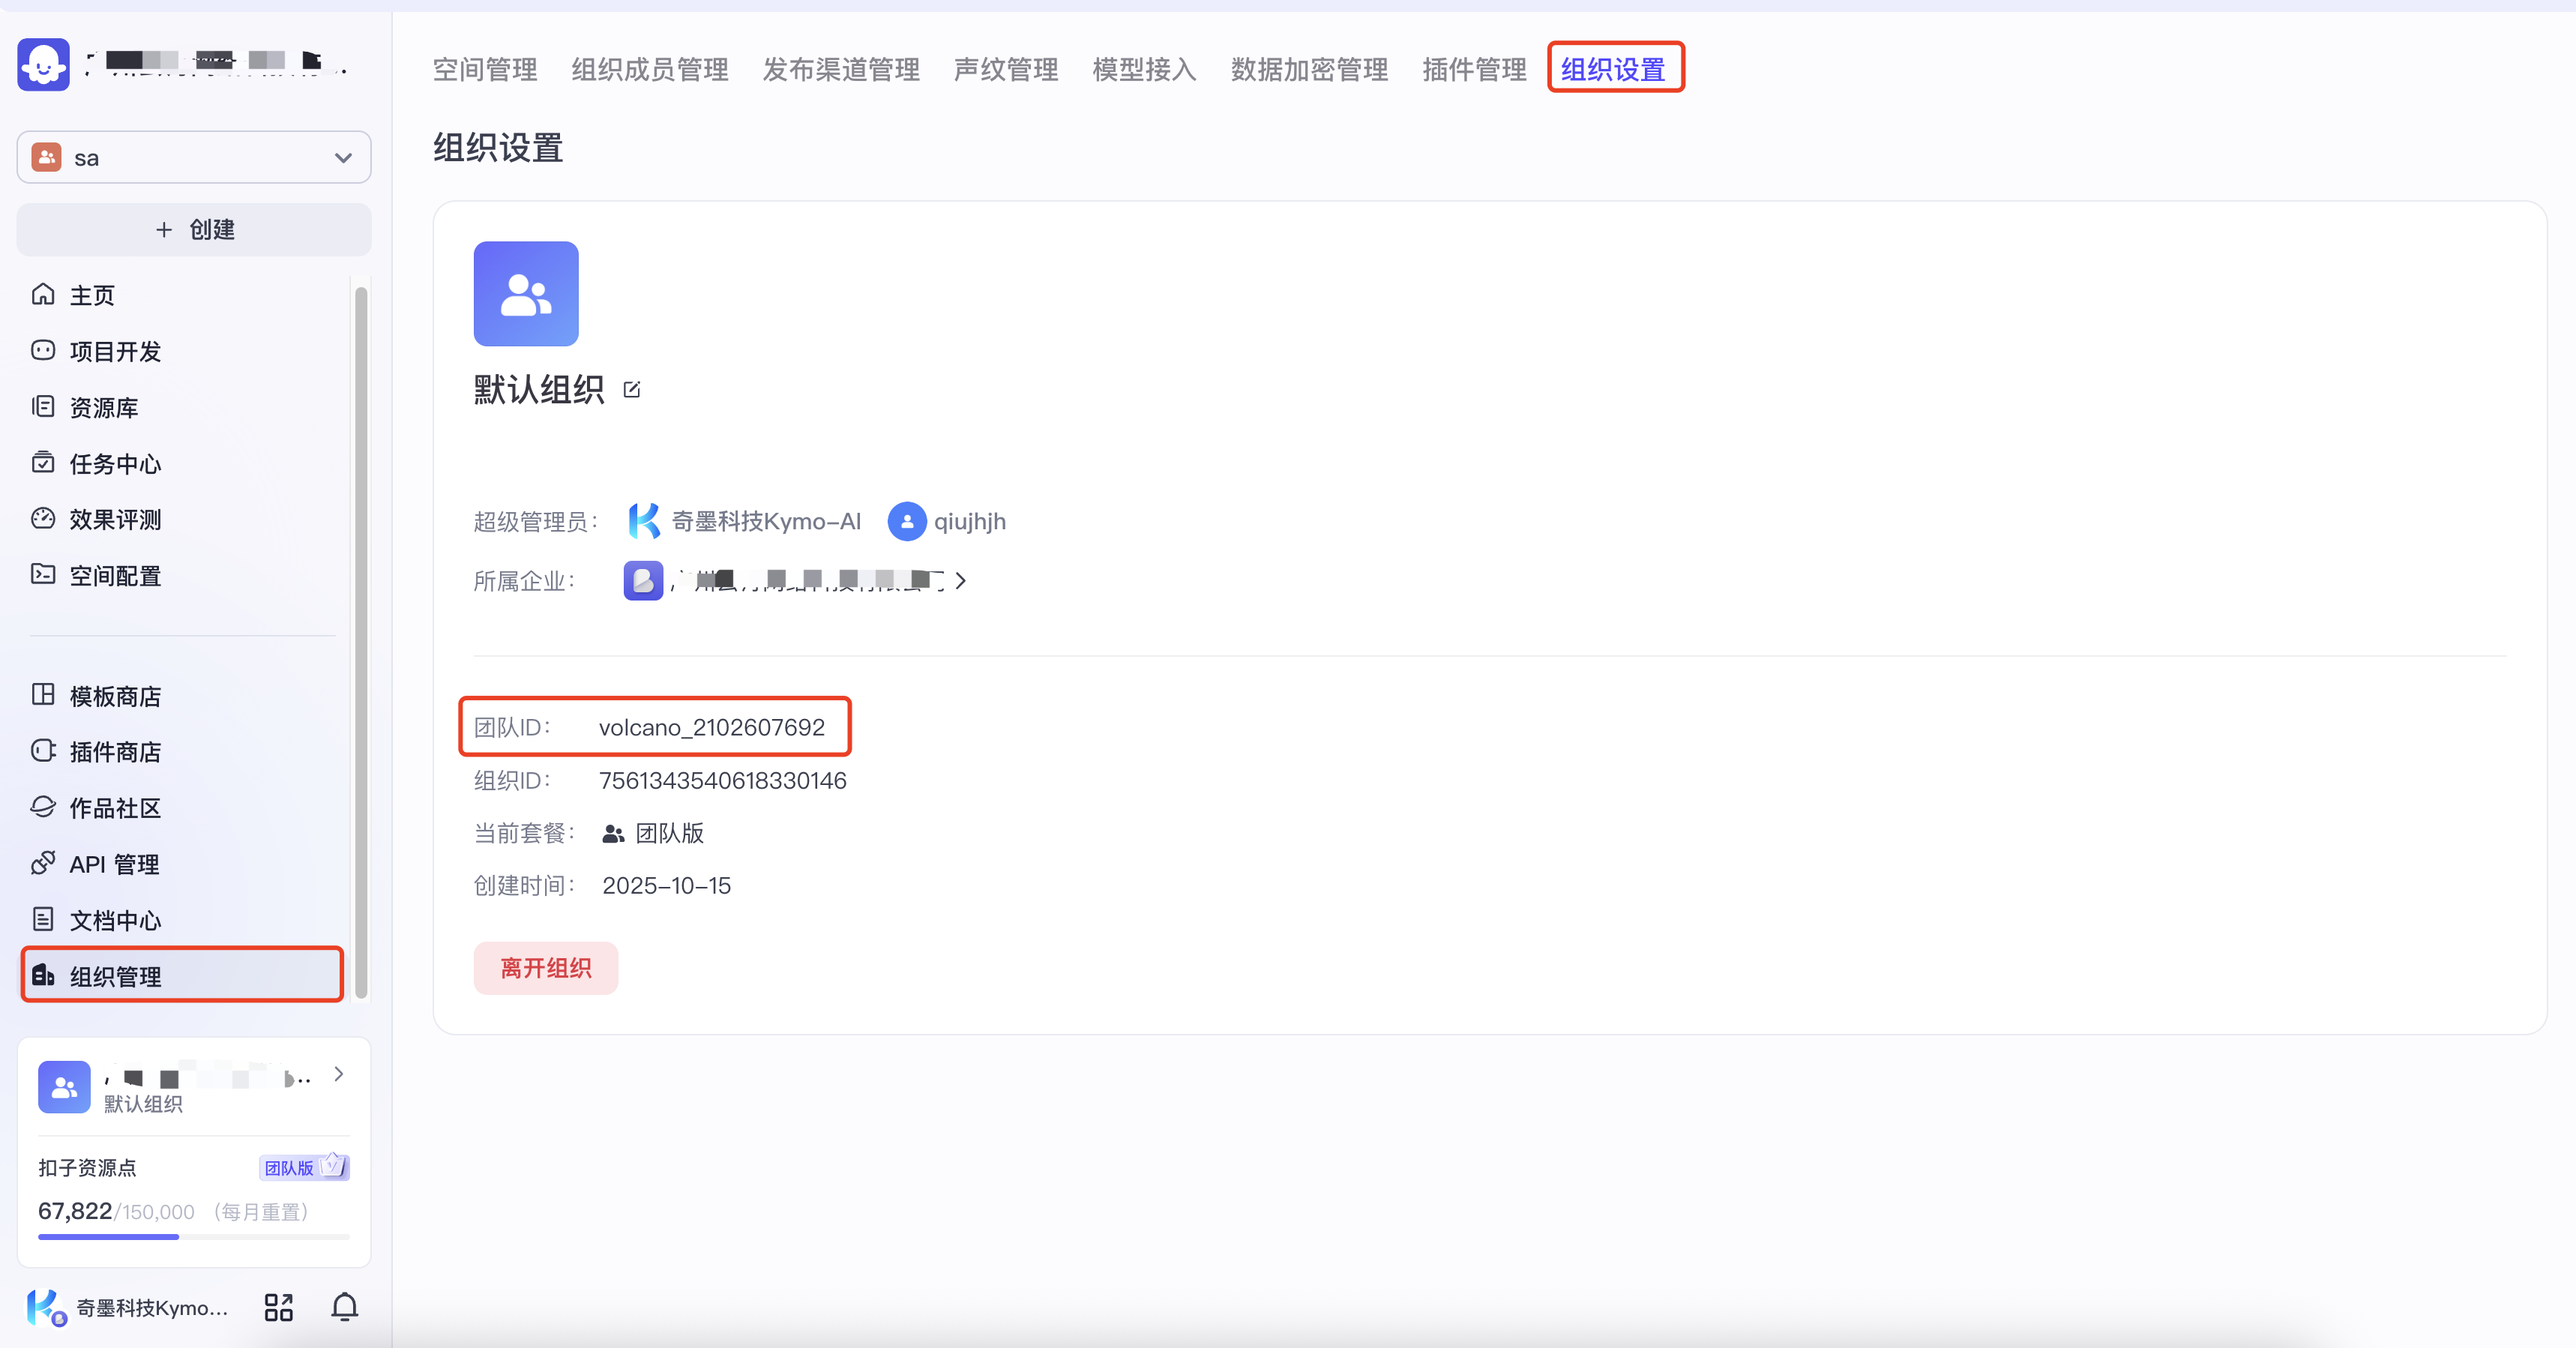
In the Agent Platform menu, click to create a new COZE Business Edition. The Access Name can be defined arbitrarily, and the Team/Enterprise ID should be filled with the Team ID of the COZE Business Edition.
Since the open-source version of COZE does not currently support mcp, you can only sync to the COZE Business Edition here.
Sync mcp instance to COZE plugin list
Select an mcp instance to sync
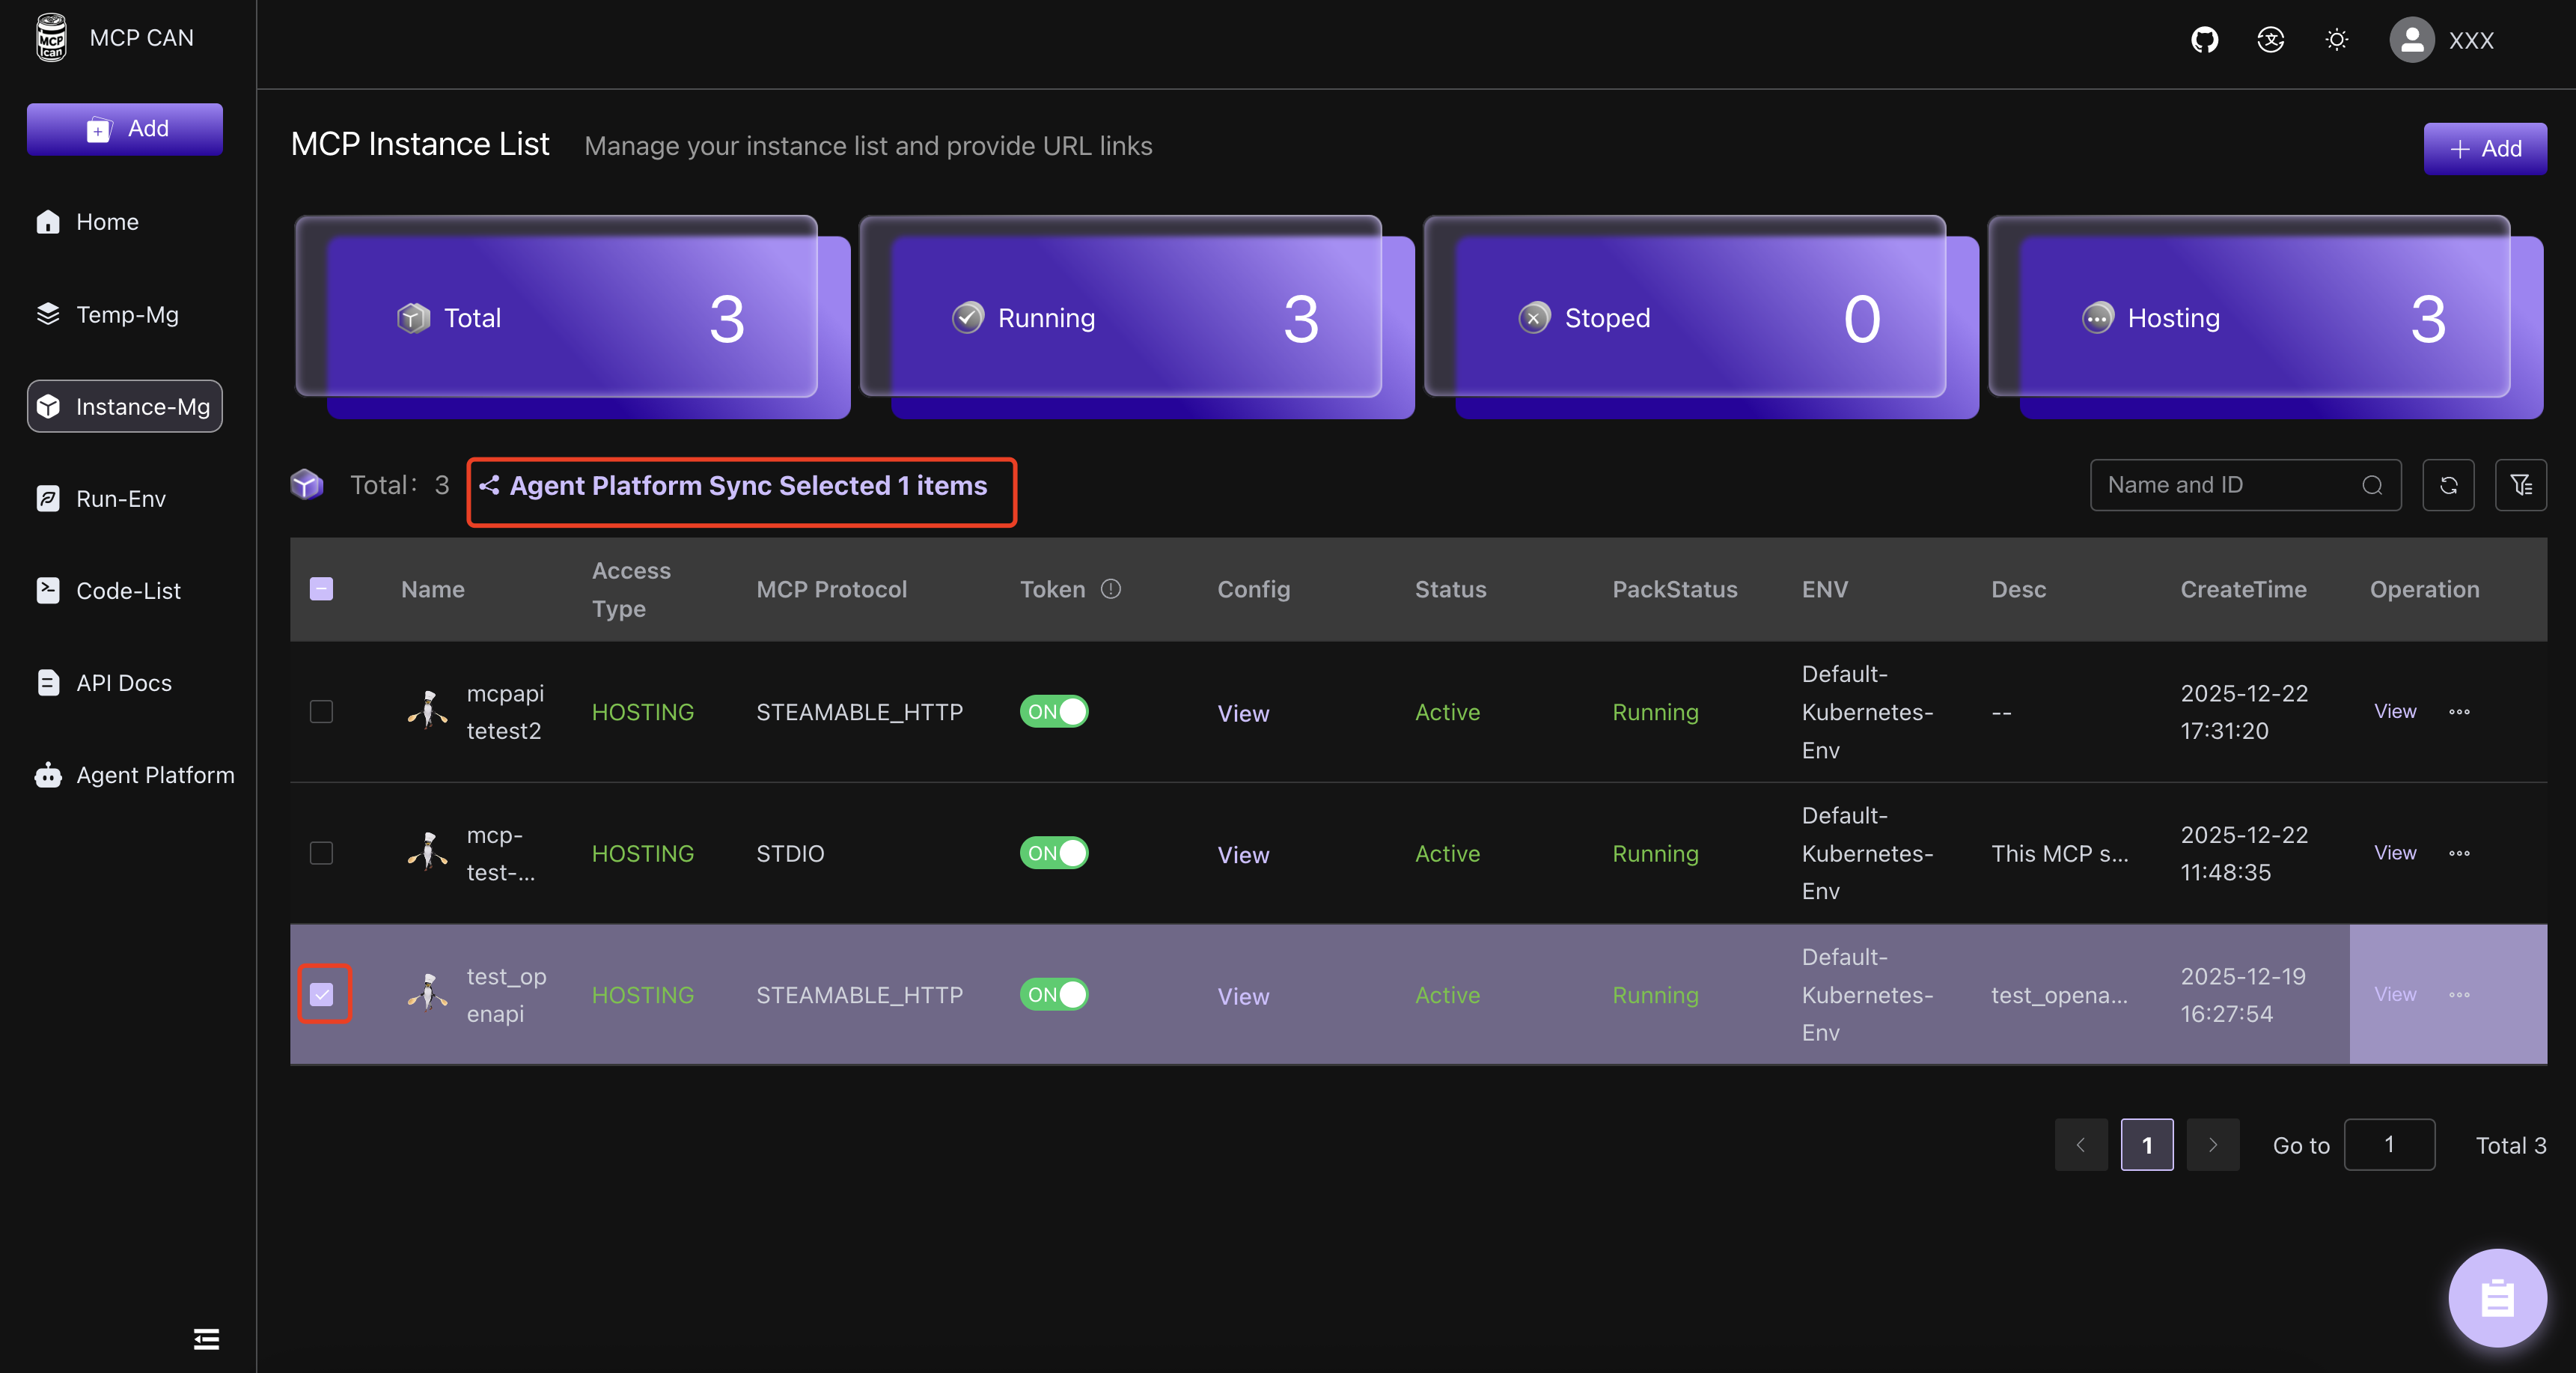
Go to the Instance Management menu, select the mcp instance to be synchronized, and click the Agent Platform Sync button.
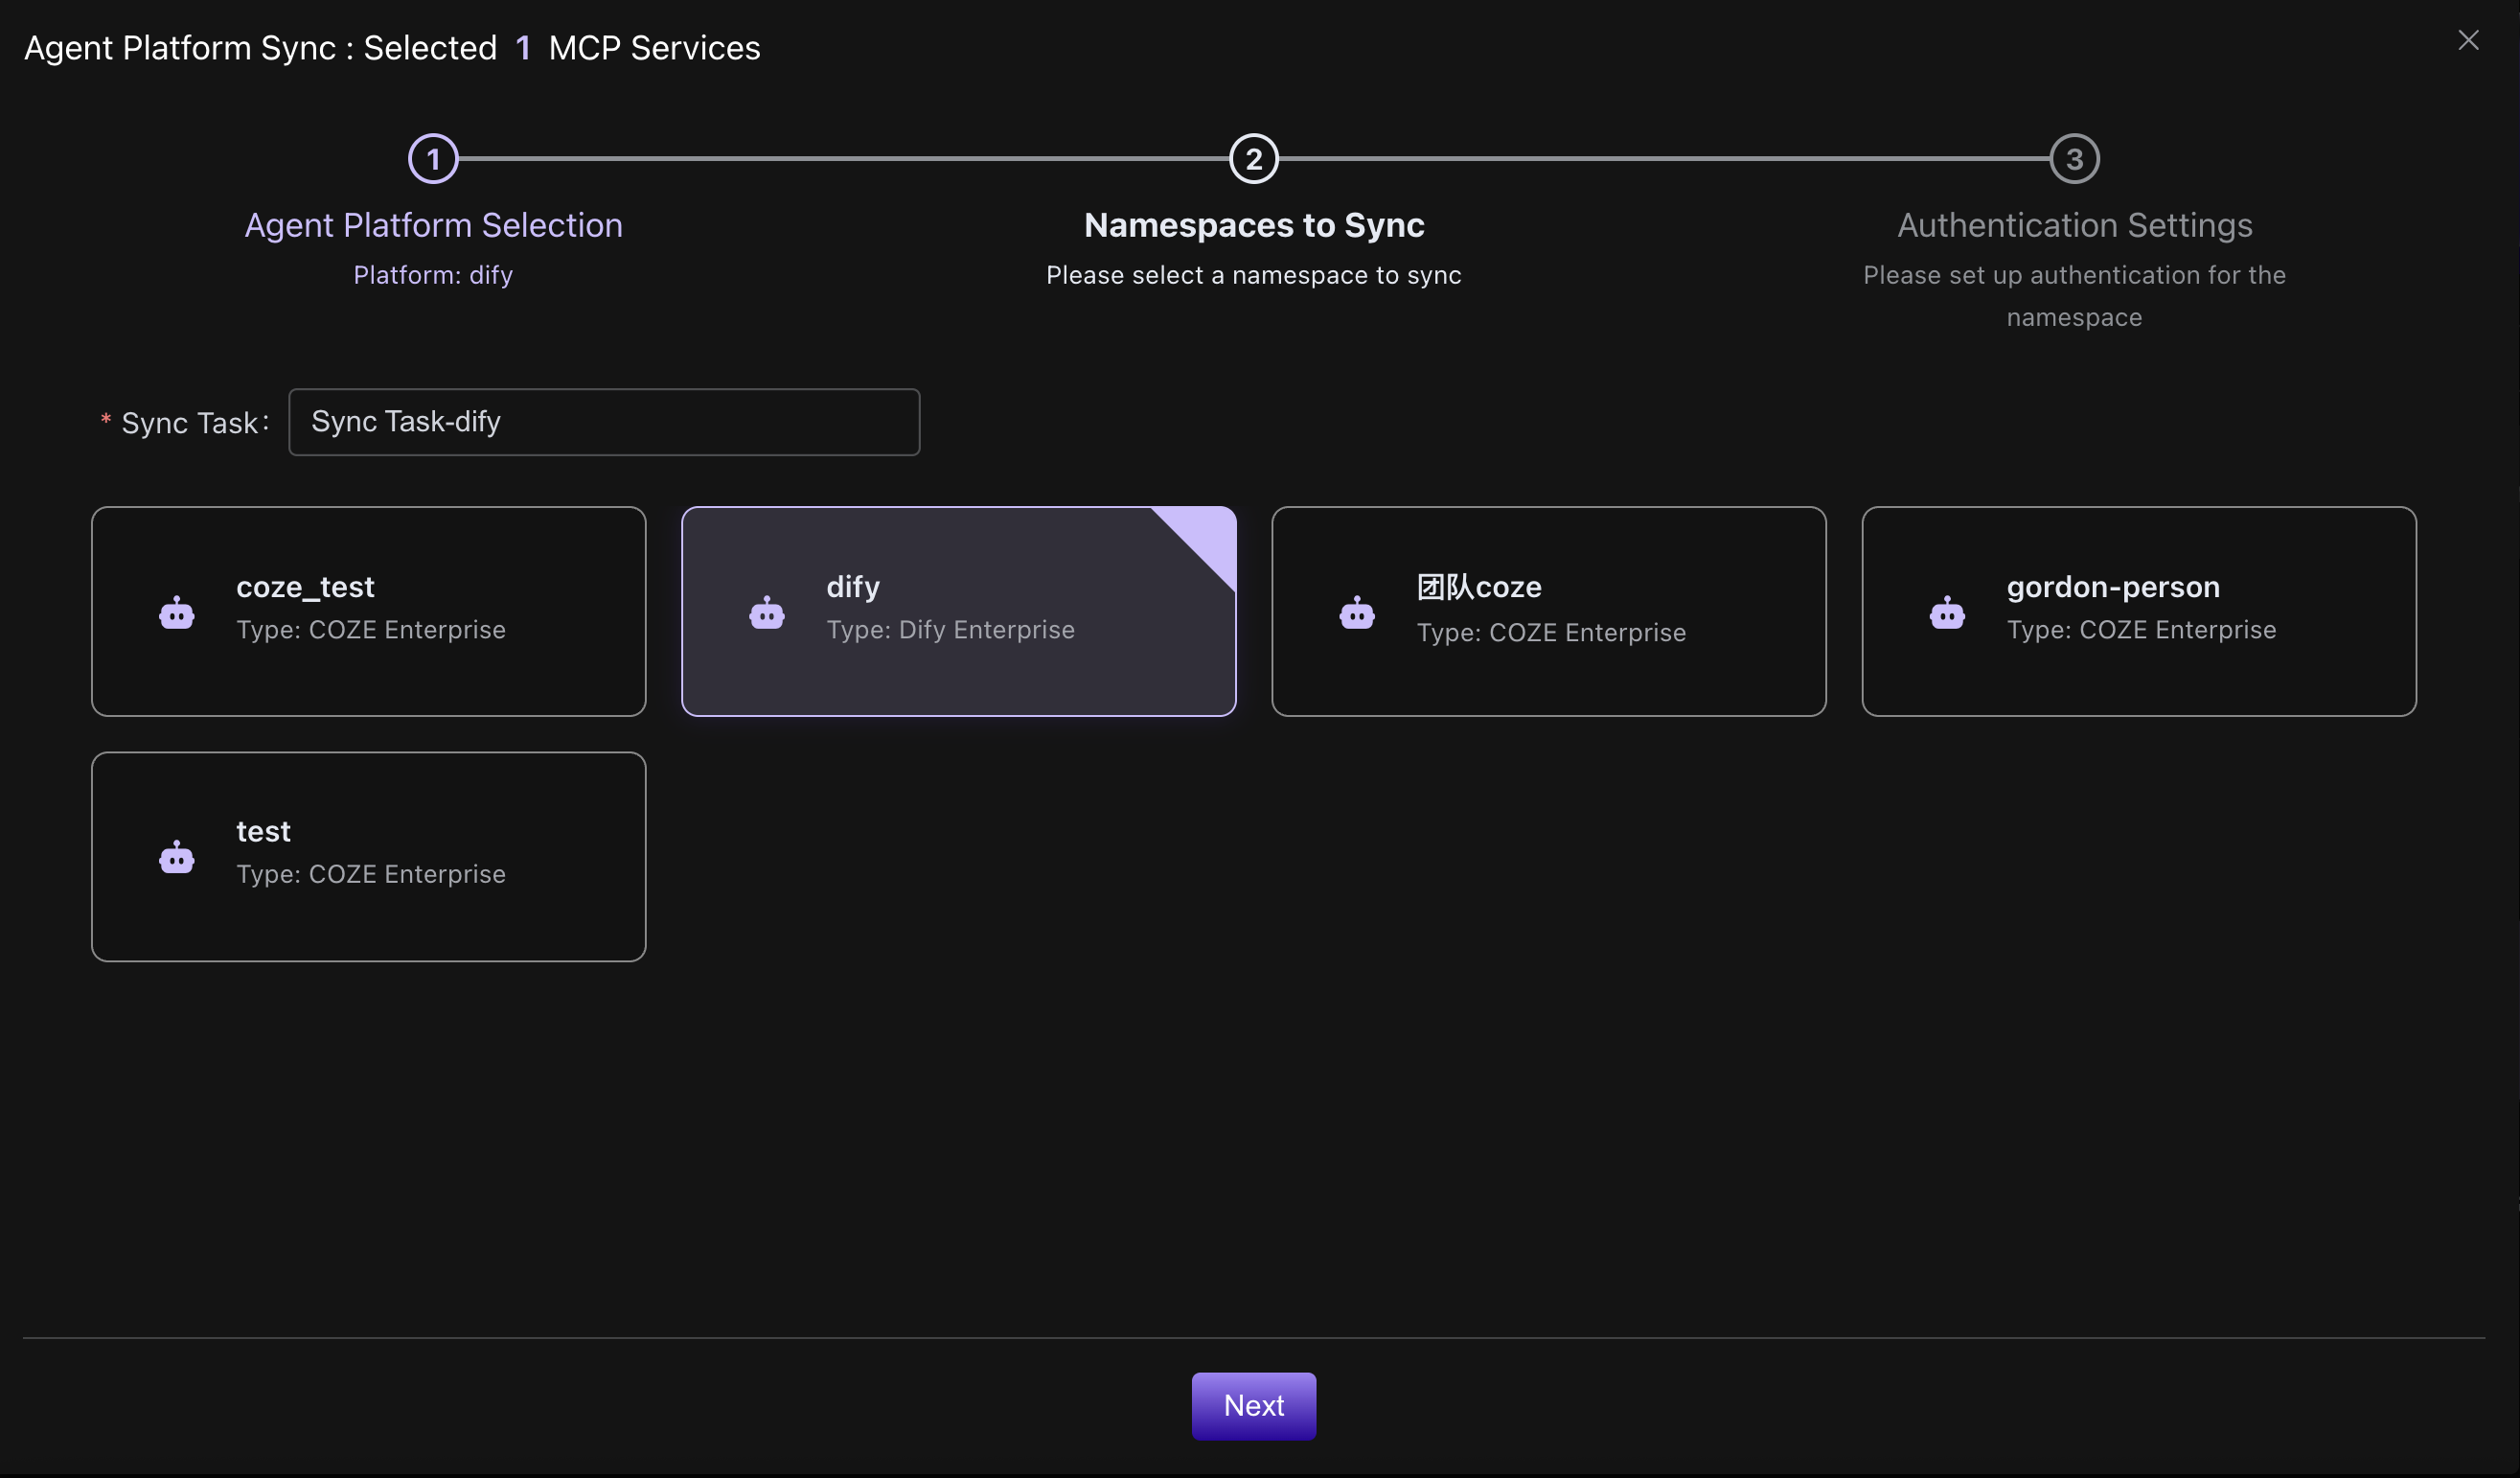
Select the newly created COZE agent platform
Next, fill in the Cookie of the COZE Business Edition user
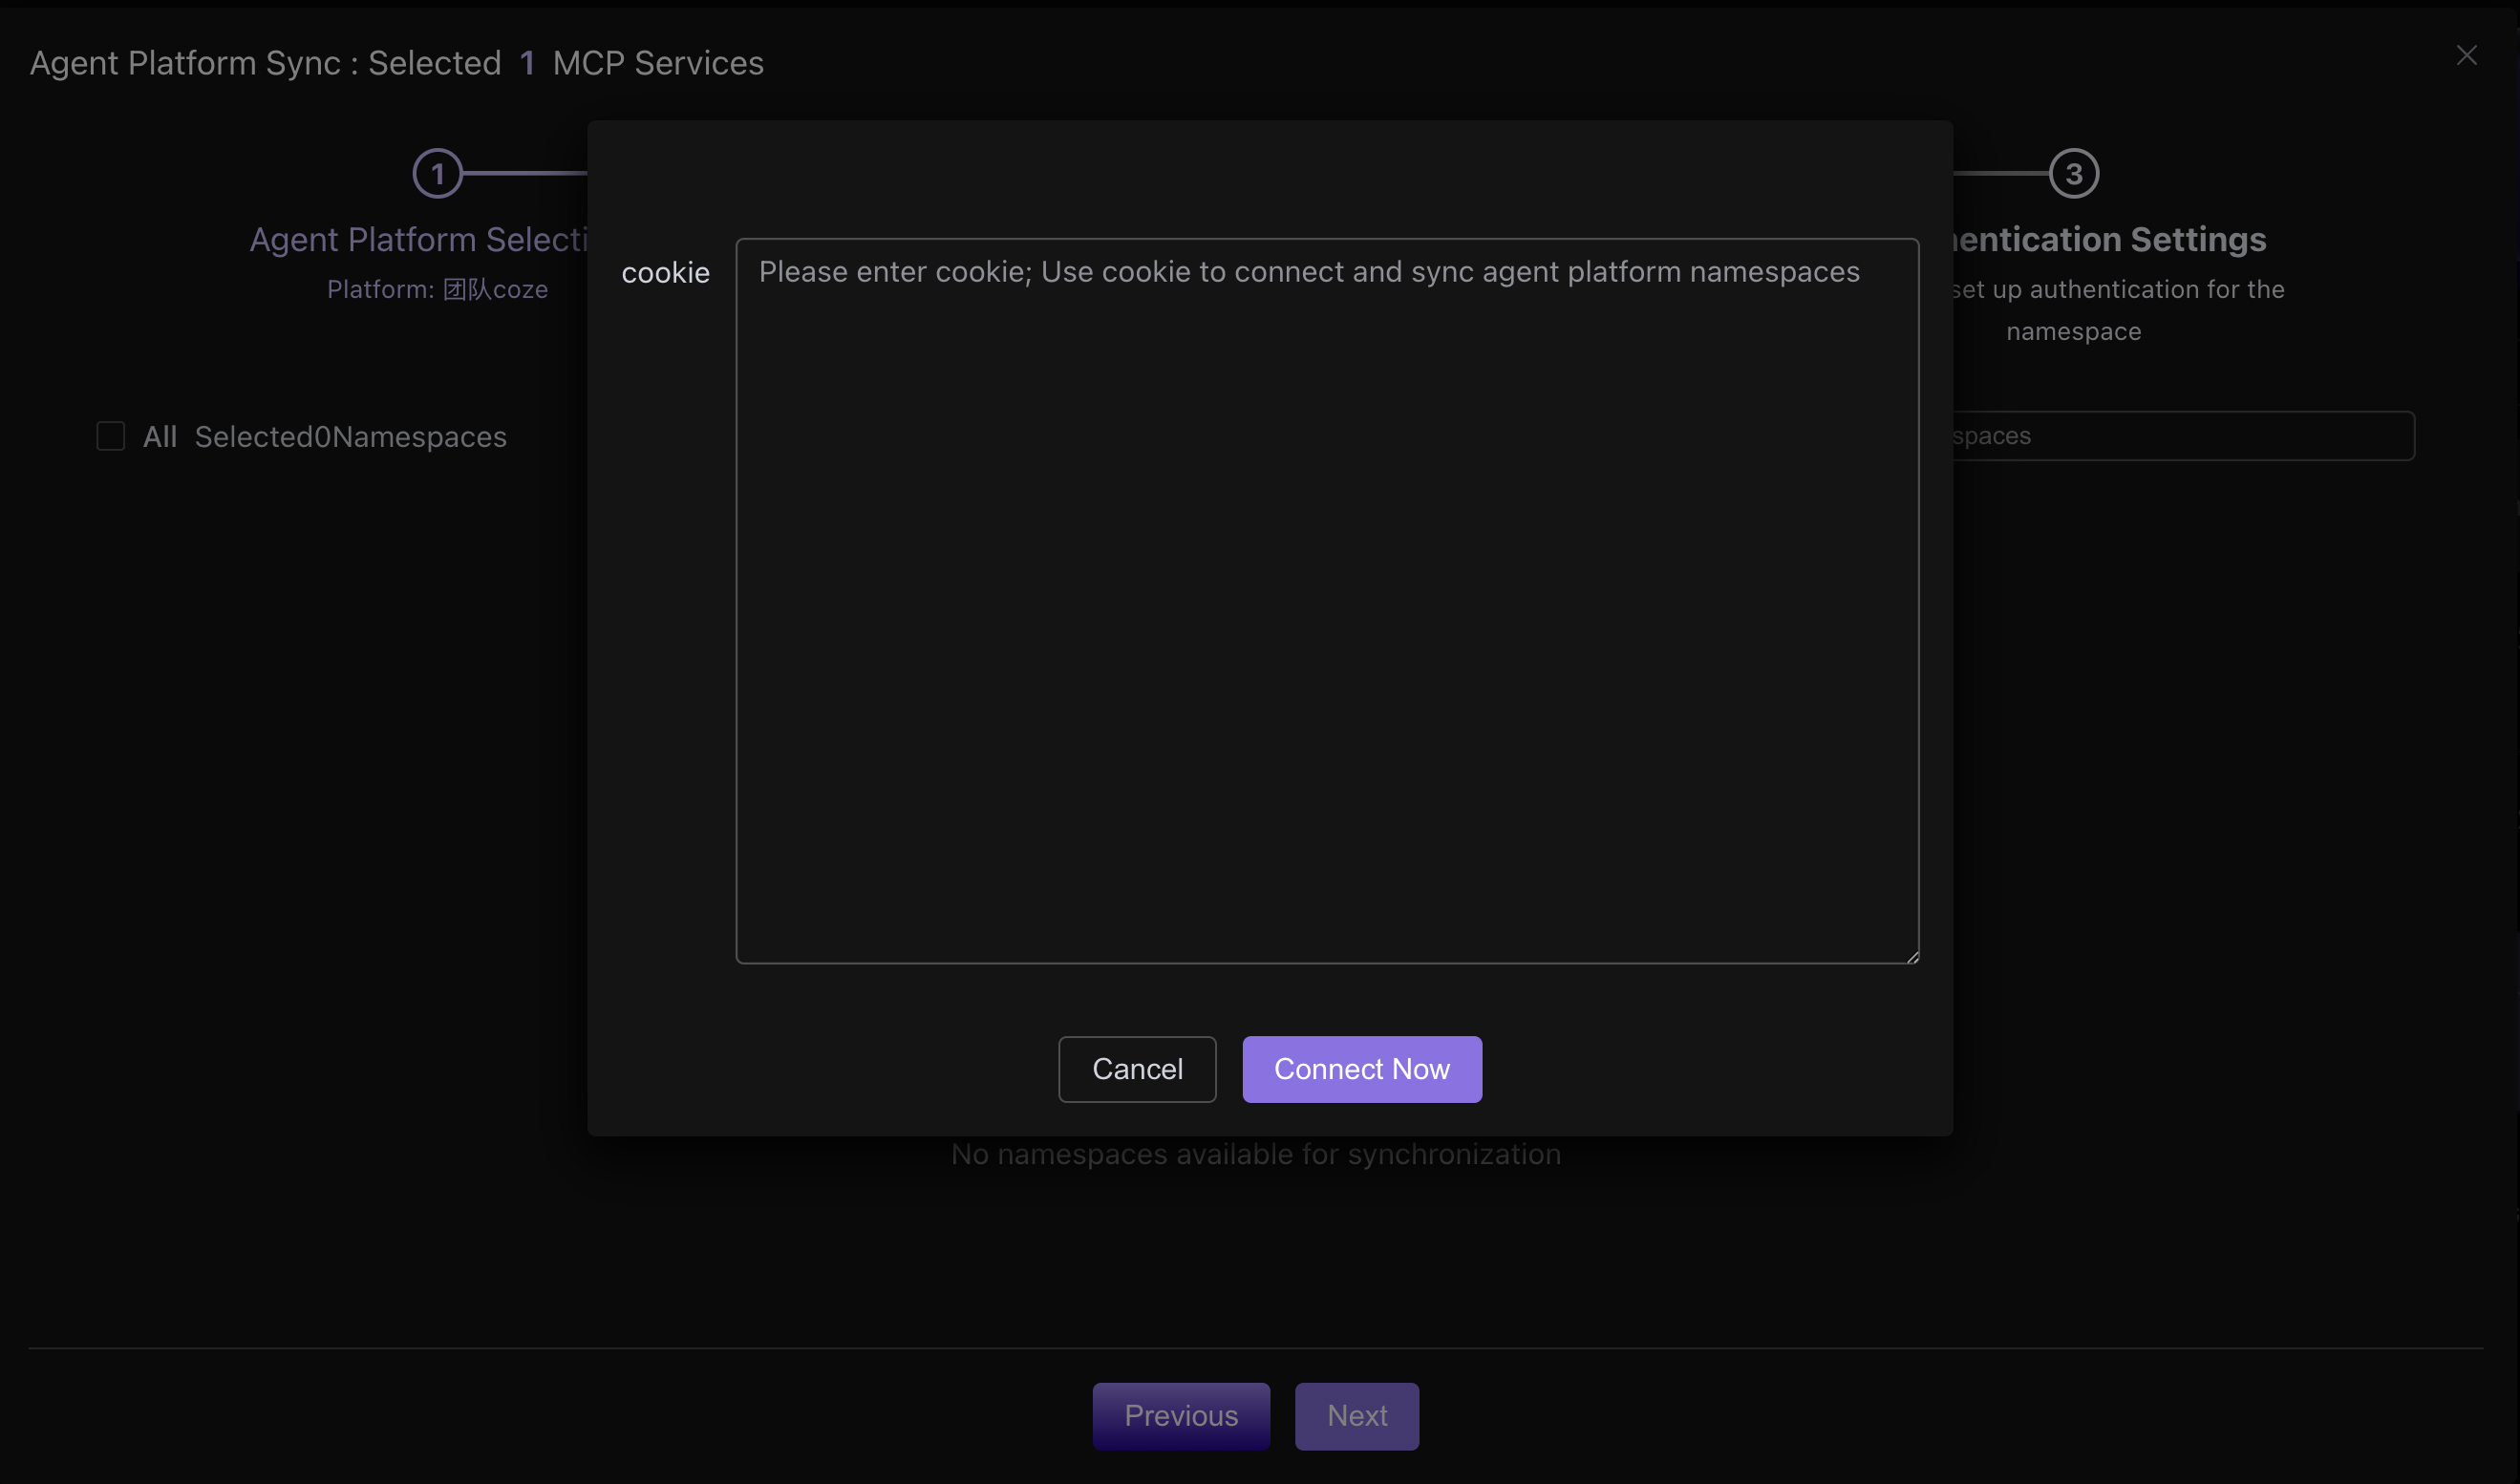
The Cookie can be obtained from the browser in the COZE Business Edition. The specific operations are as follows:
- Log in to the COZE Business Edition
- Open the browser's developer tools (F12 or right-click on the page and select "Inspect")
- Switch to the "Network" tab
- Refresh the page
- Find a request in the network request list
- Click on the request and find the
Cookiefield in the "Request Headers" on the right - Copy the value of the
Cookiefield
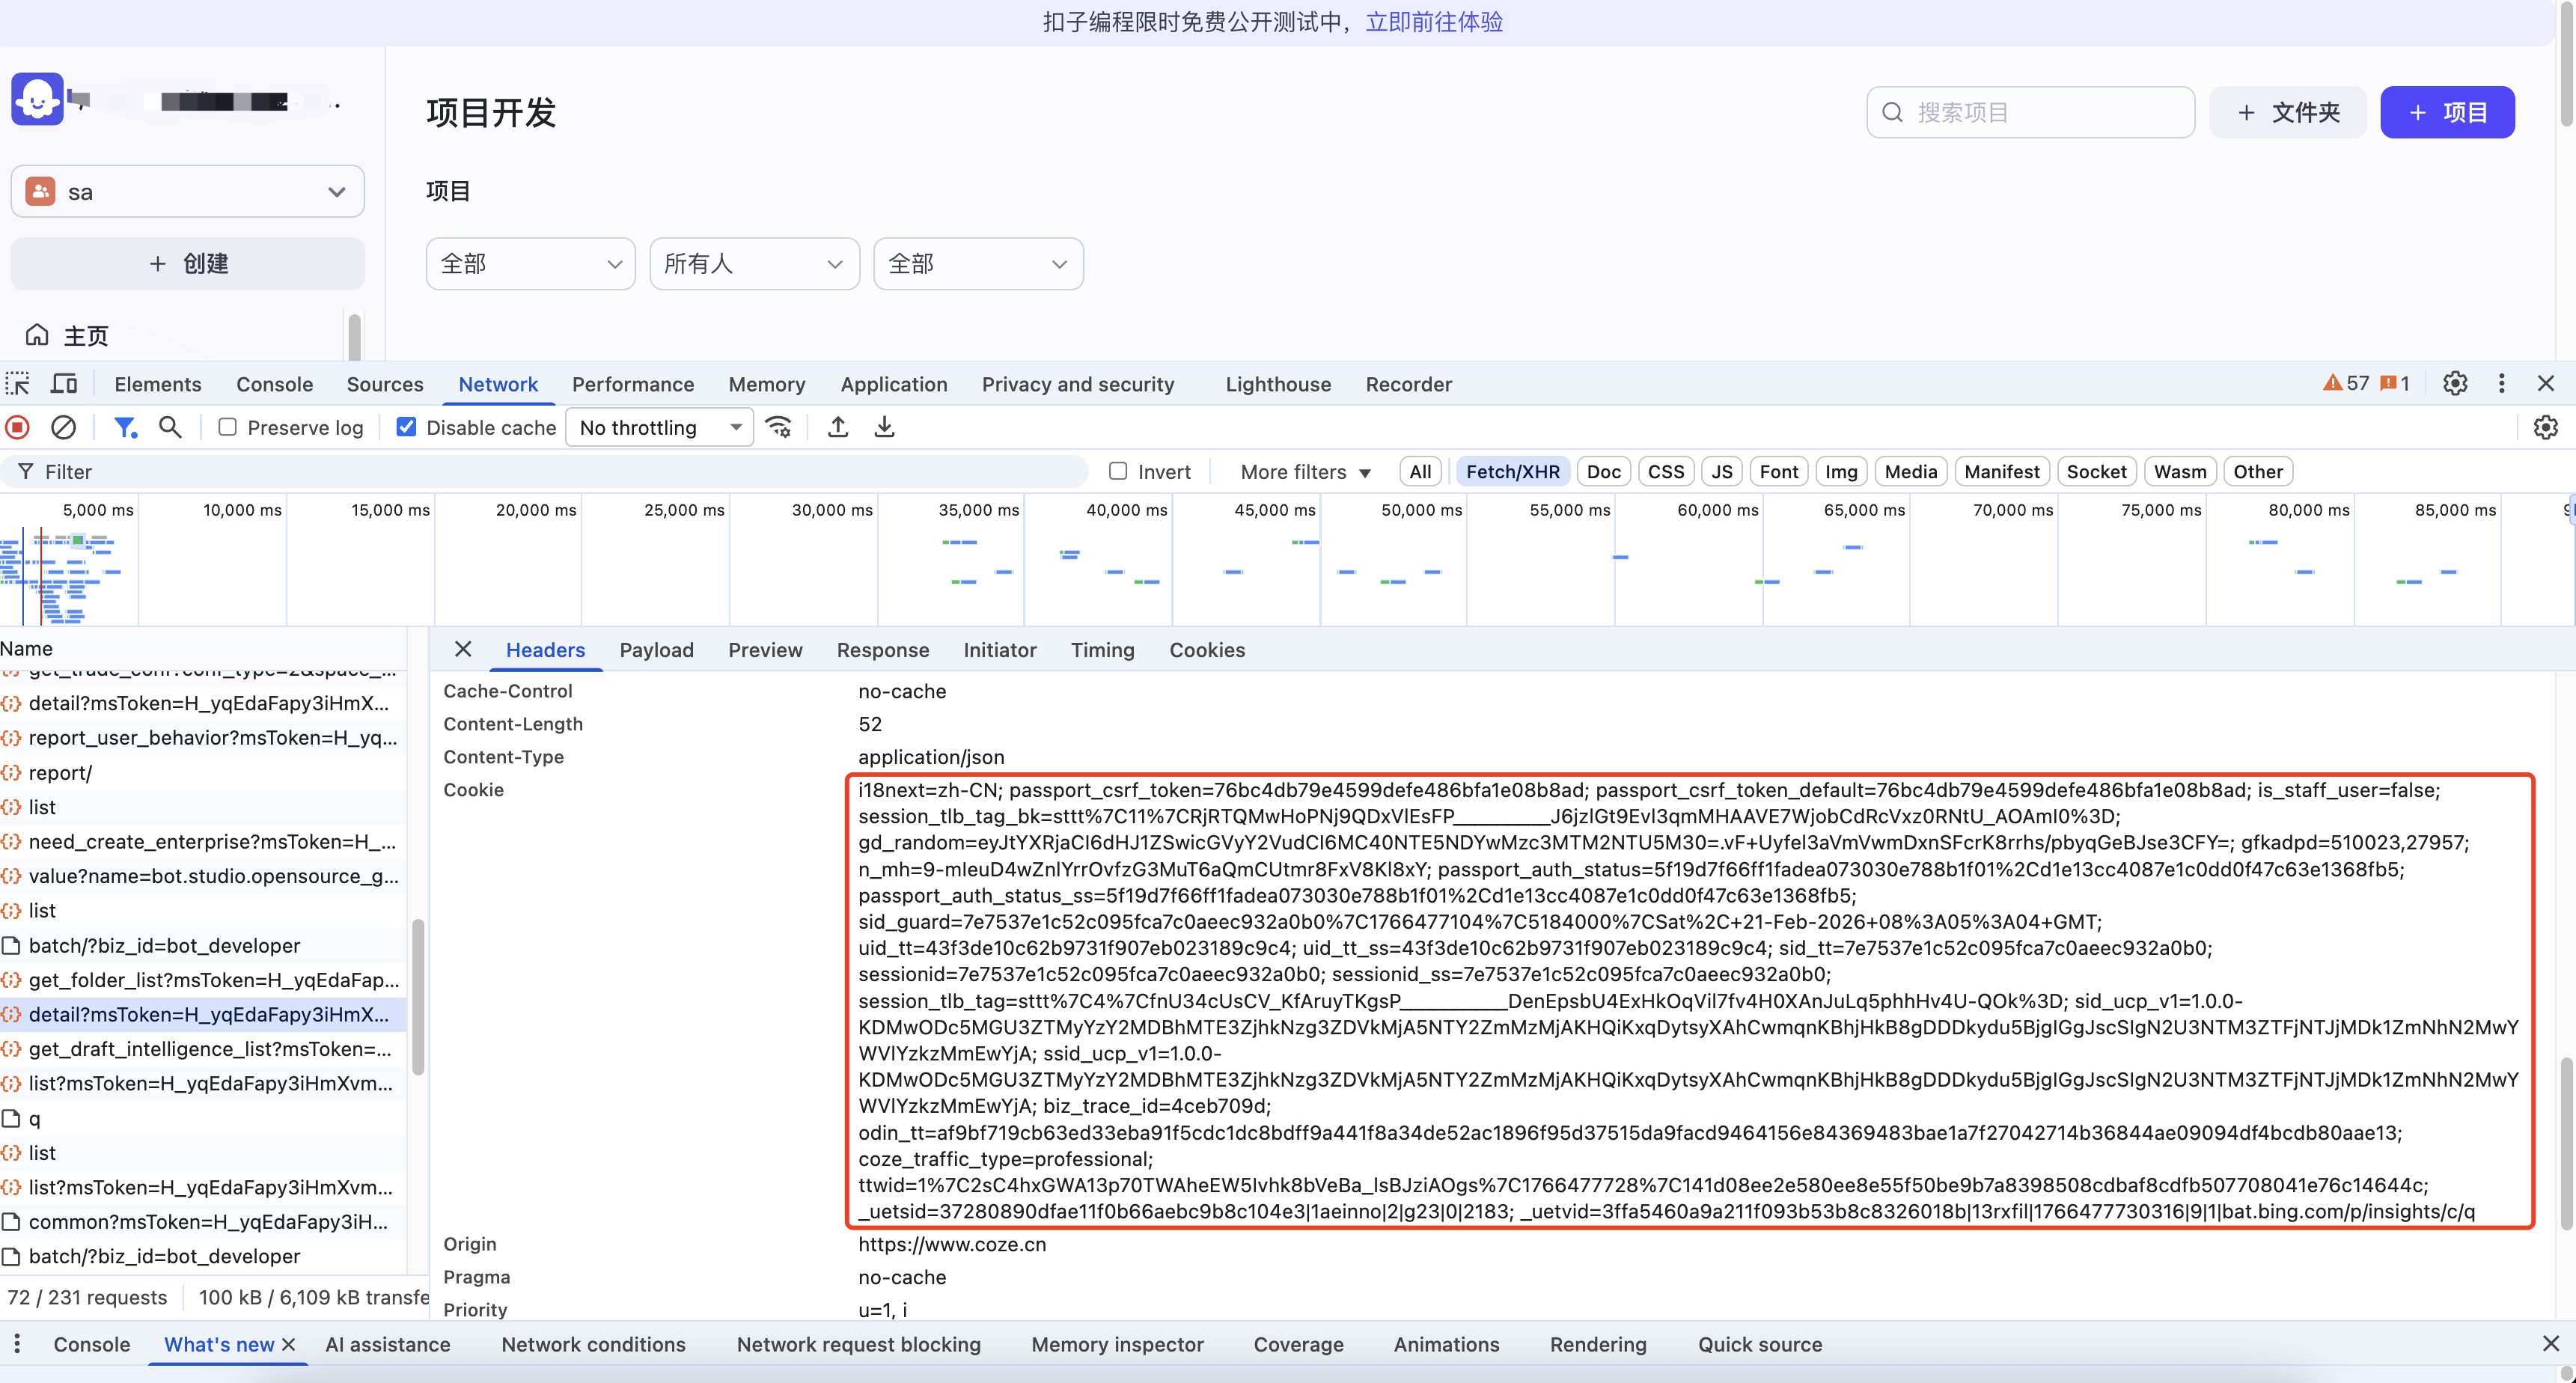
Since the officially authorized API of COZE does not currently support plugin management, the WEB interface of the COZE Business Edition can only be called through Cookies.
Select the space in COZE that needs to be synced
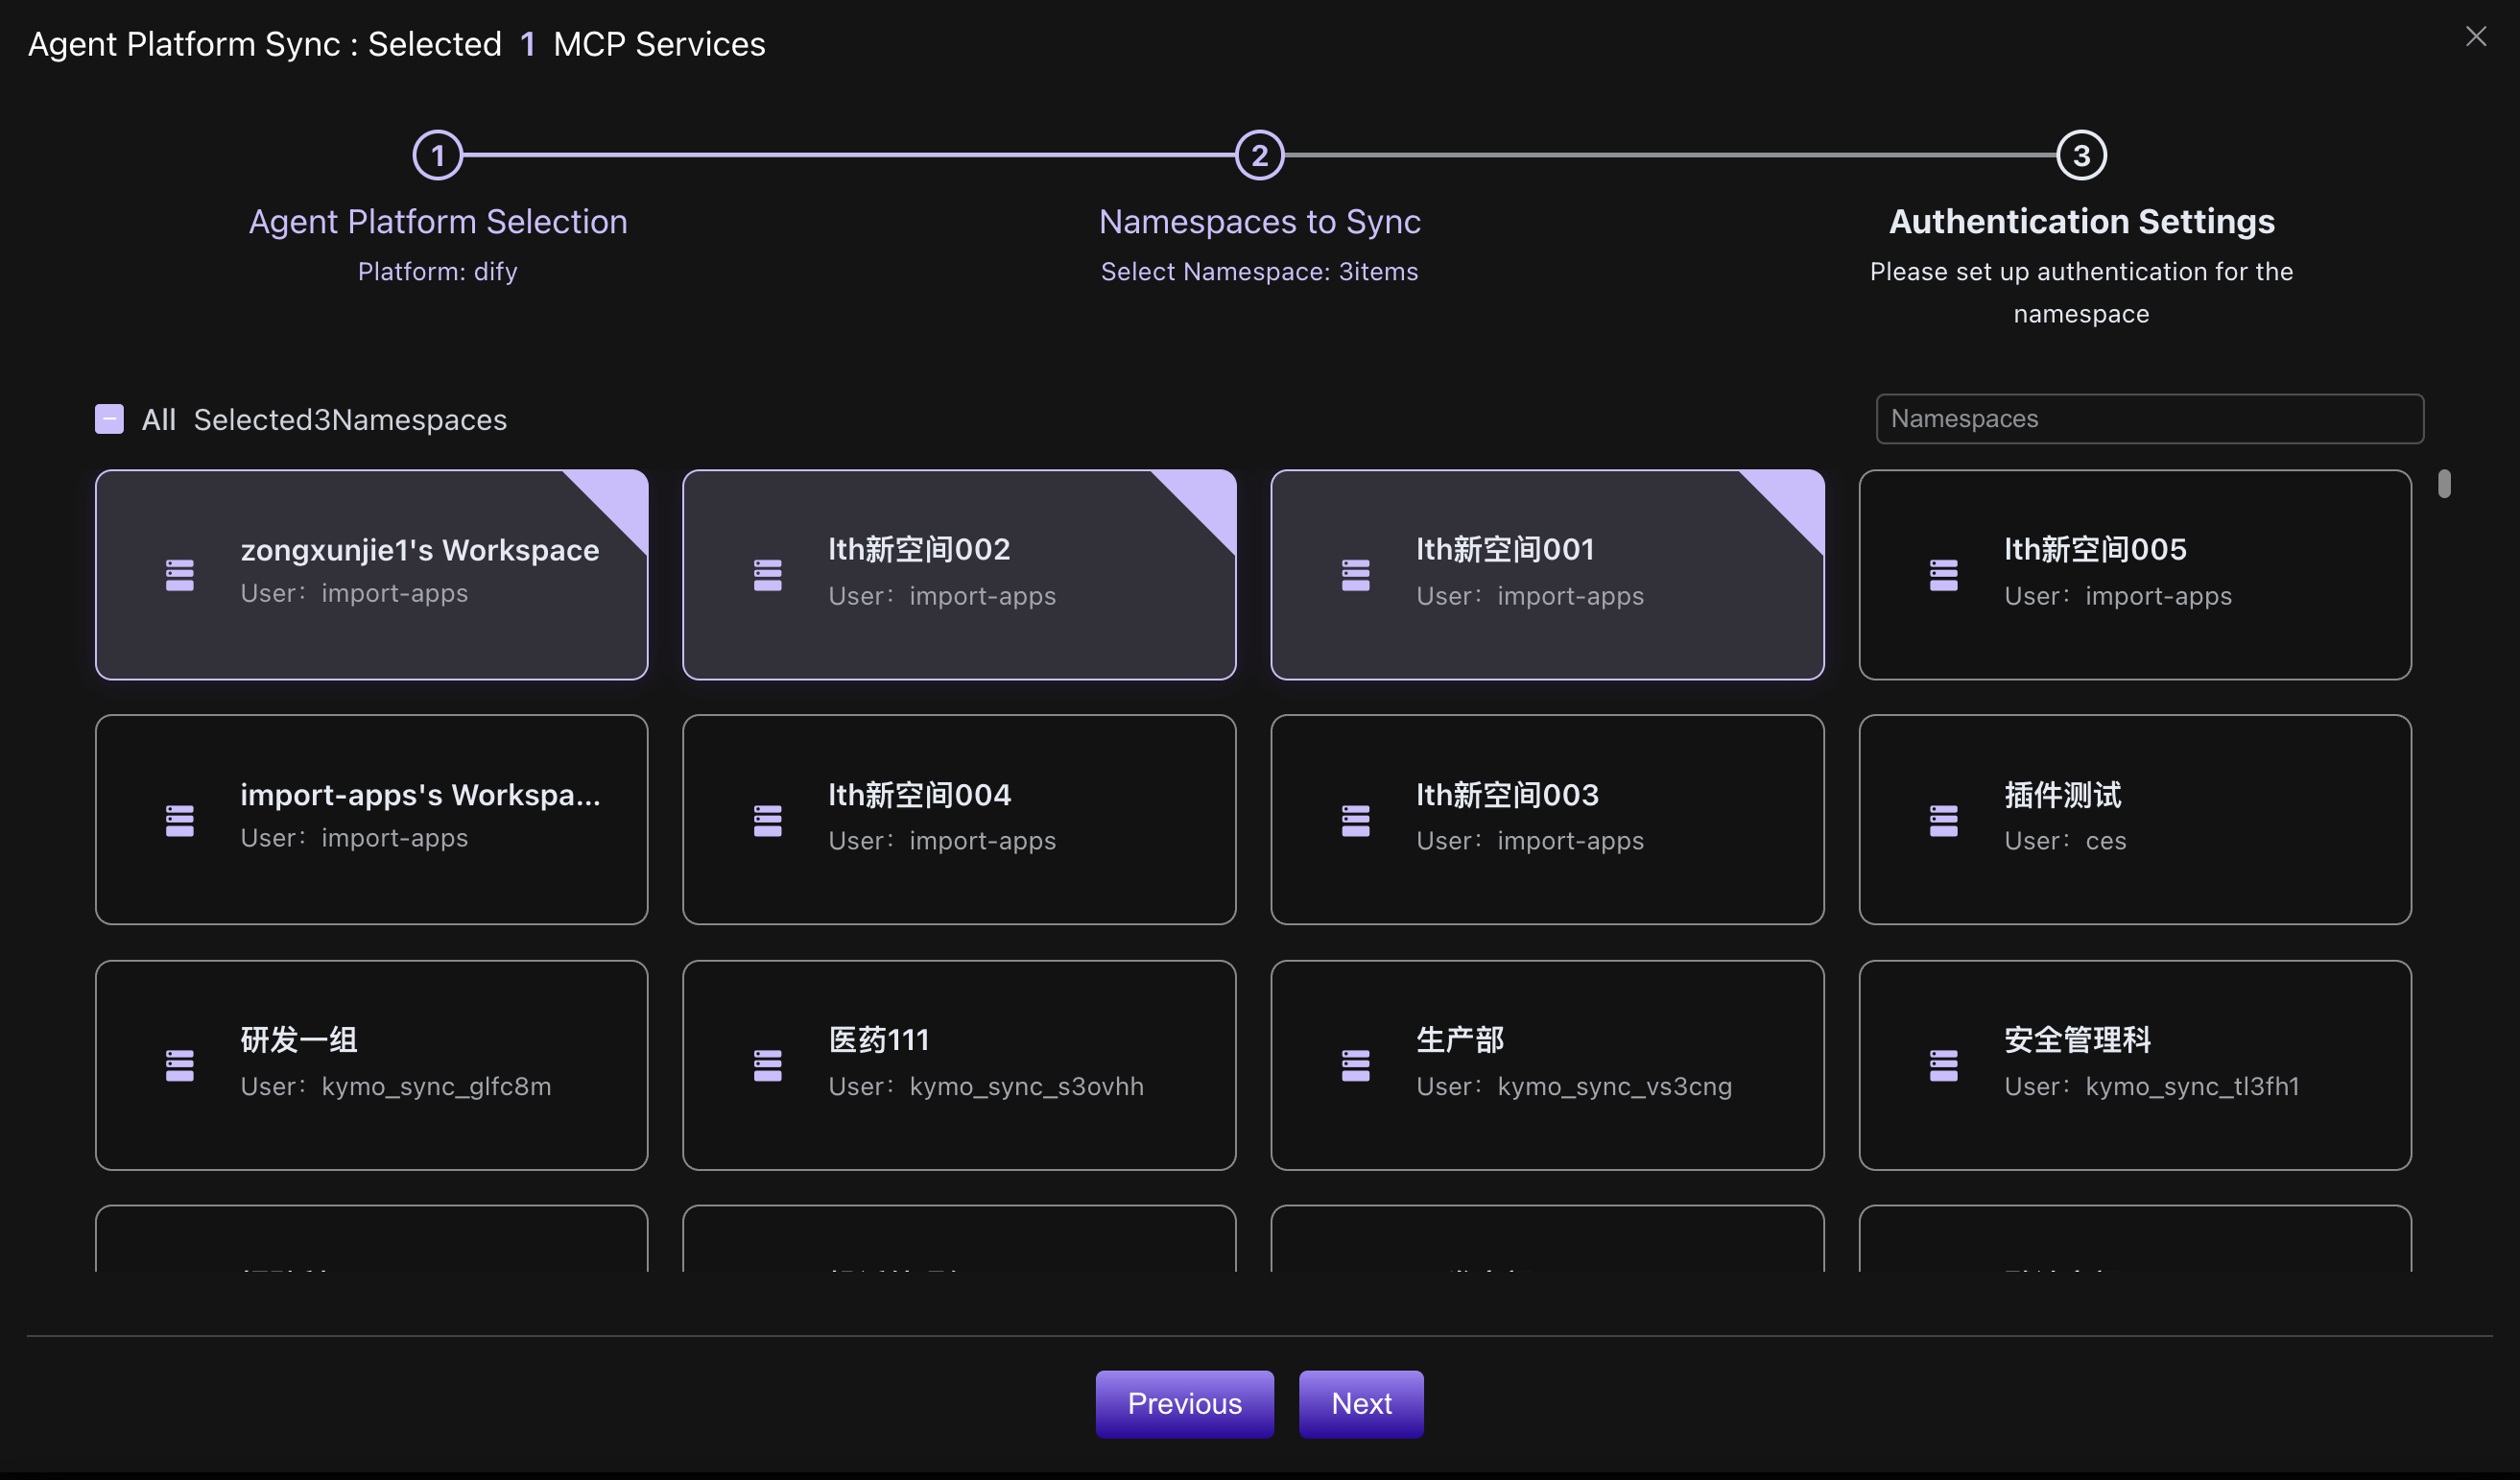
Only spaces for which the user with this Cookie is an
OwnerorAdministratorwill be retrieved here.
Set the pass-through headers for mcpcan proxy access for each space
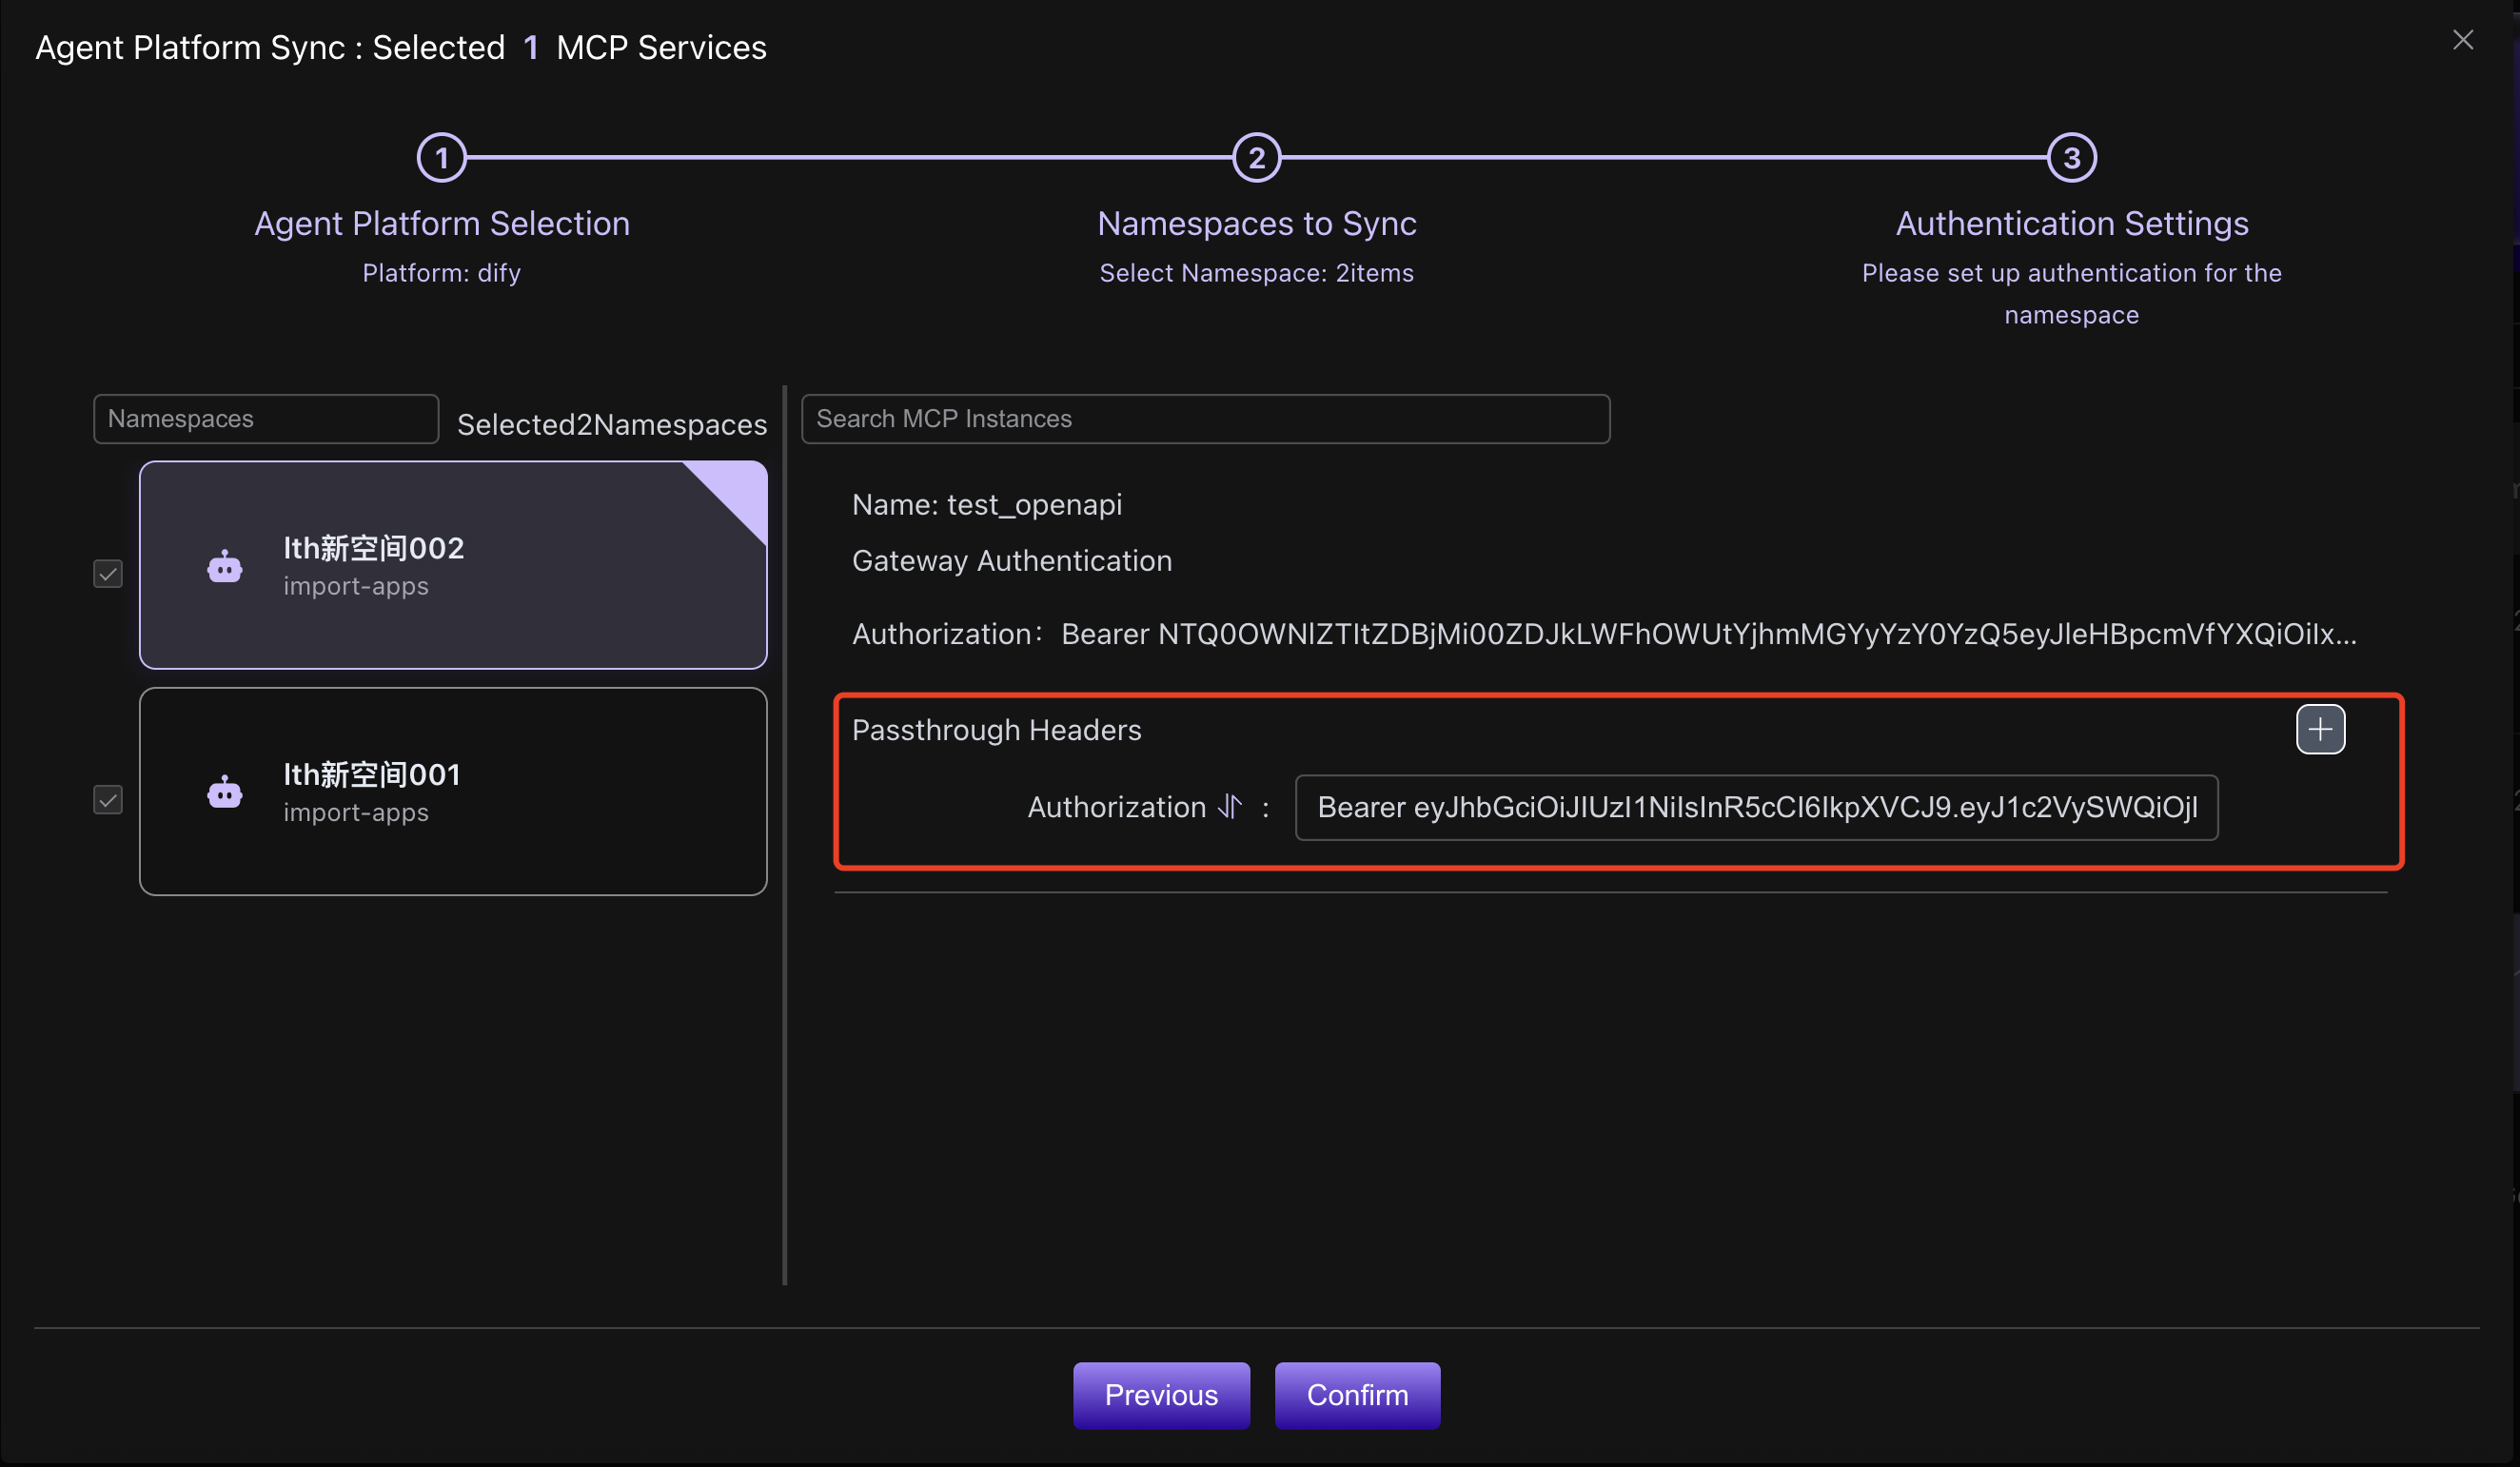
mcpcan will initialize an authorization credential for each space by default. This credential will be passed through when mcpcan accesses COZE through the proxy.
The gateway authentication's Authorization will be synchronized to the header of the COZE mcp plugin, while the pass-through headers will be passed to the actual mcp server after mcpcan receives the proxy request.
mcpcan will initialize different gateway authentication Authorizations for each space. The pass-through headers will use the default pass-through headers from the instance's
MCP Access Configuration.
After enabling synchronization, check the sync status and error messages
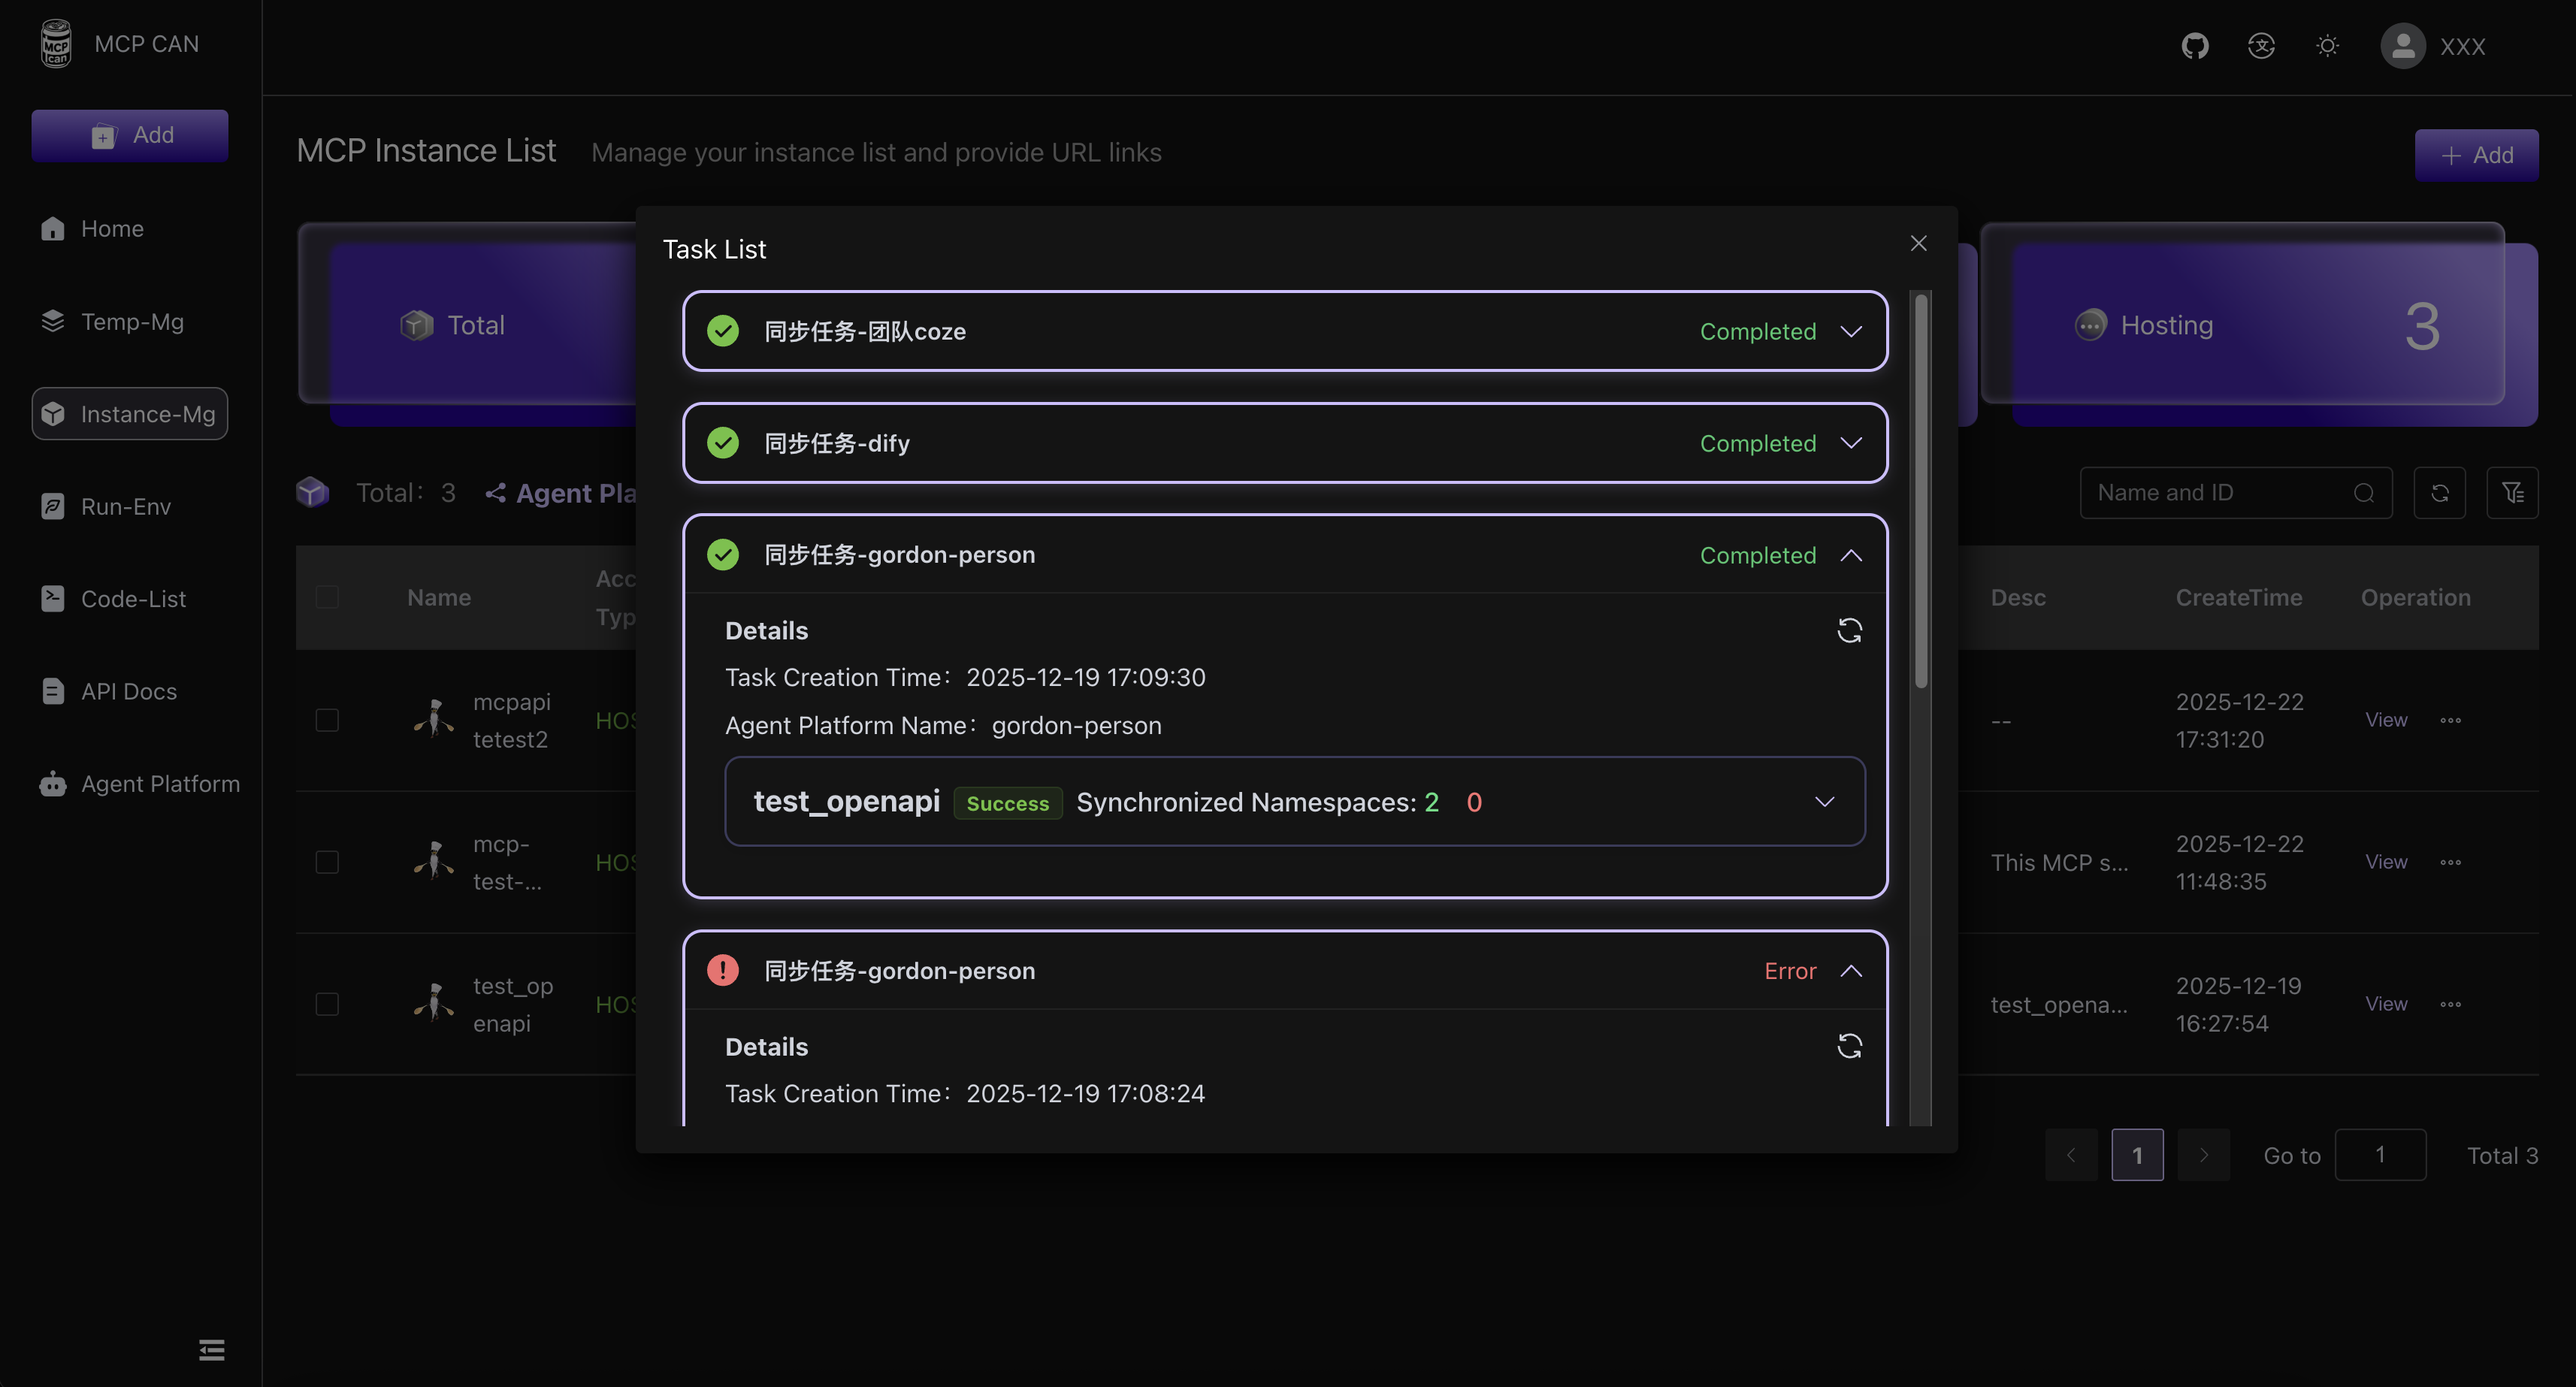
After confirming the synchronization, a sync status page will pop up. This page allows you to view the sync status and error messages for each instance in each space.
Manage authorization for each space in Instance Management
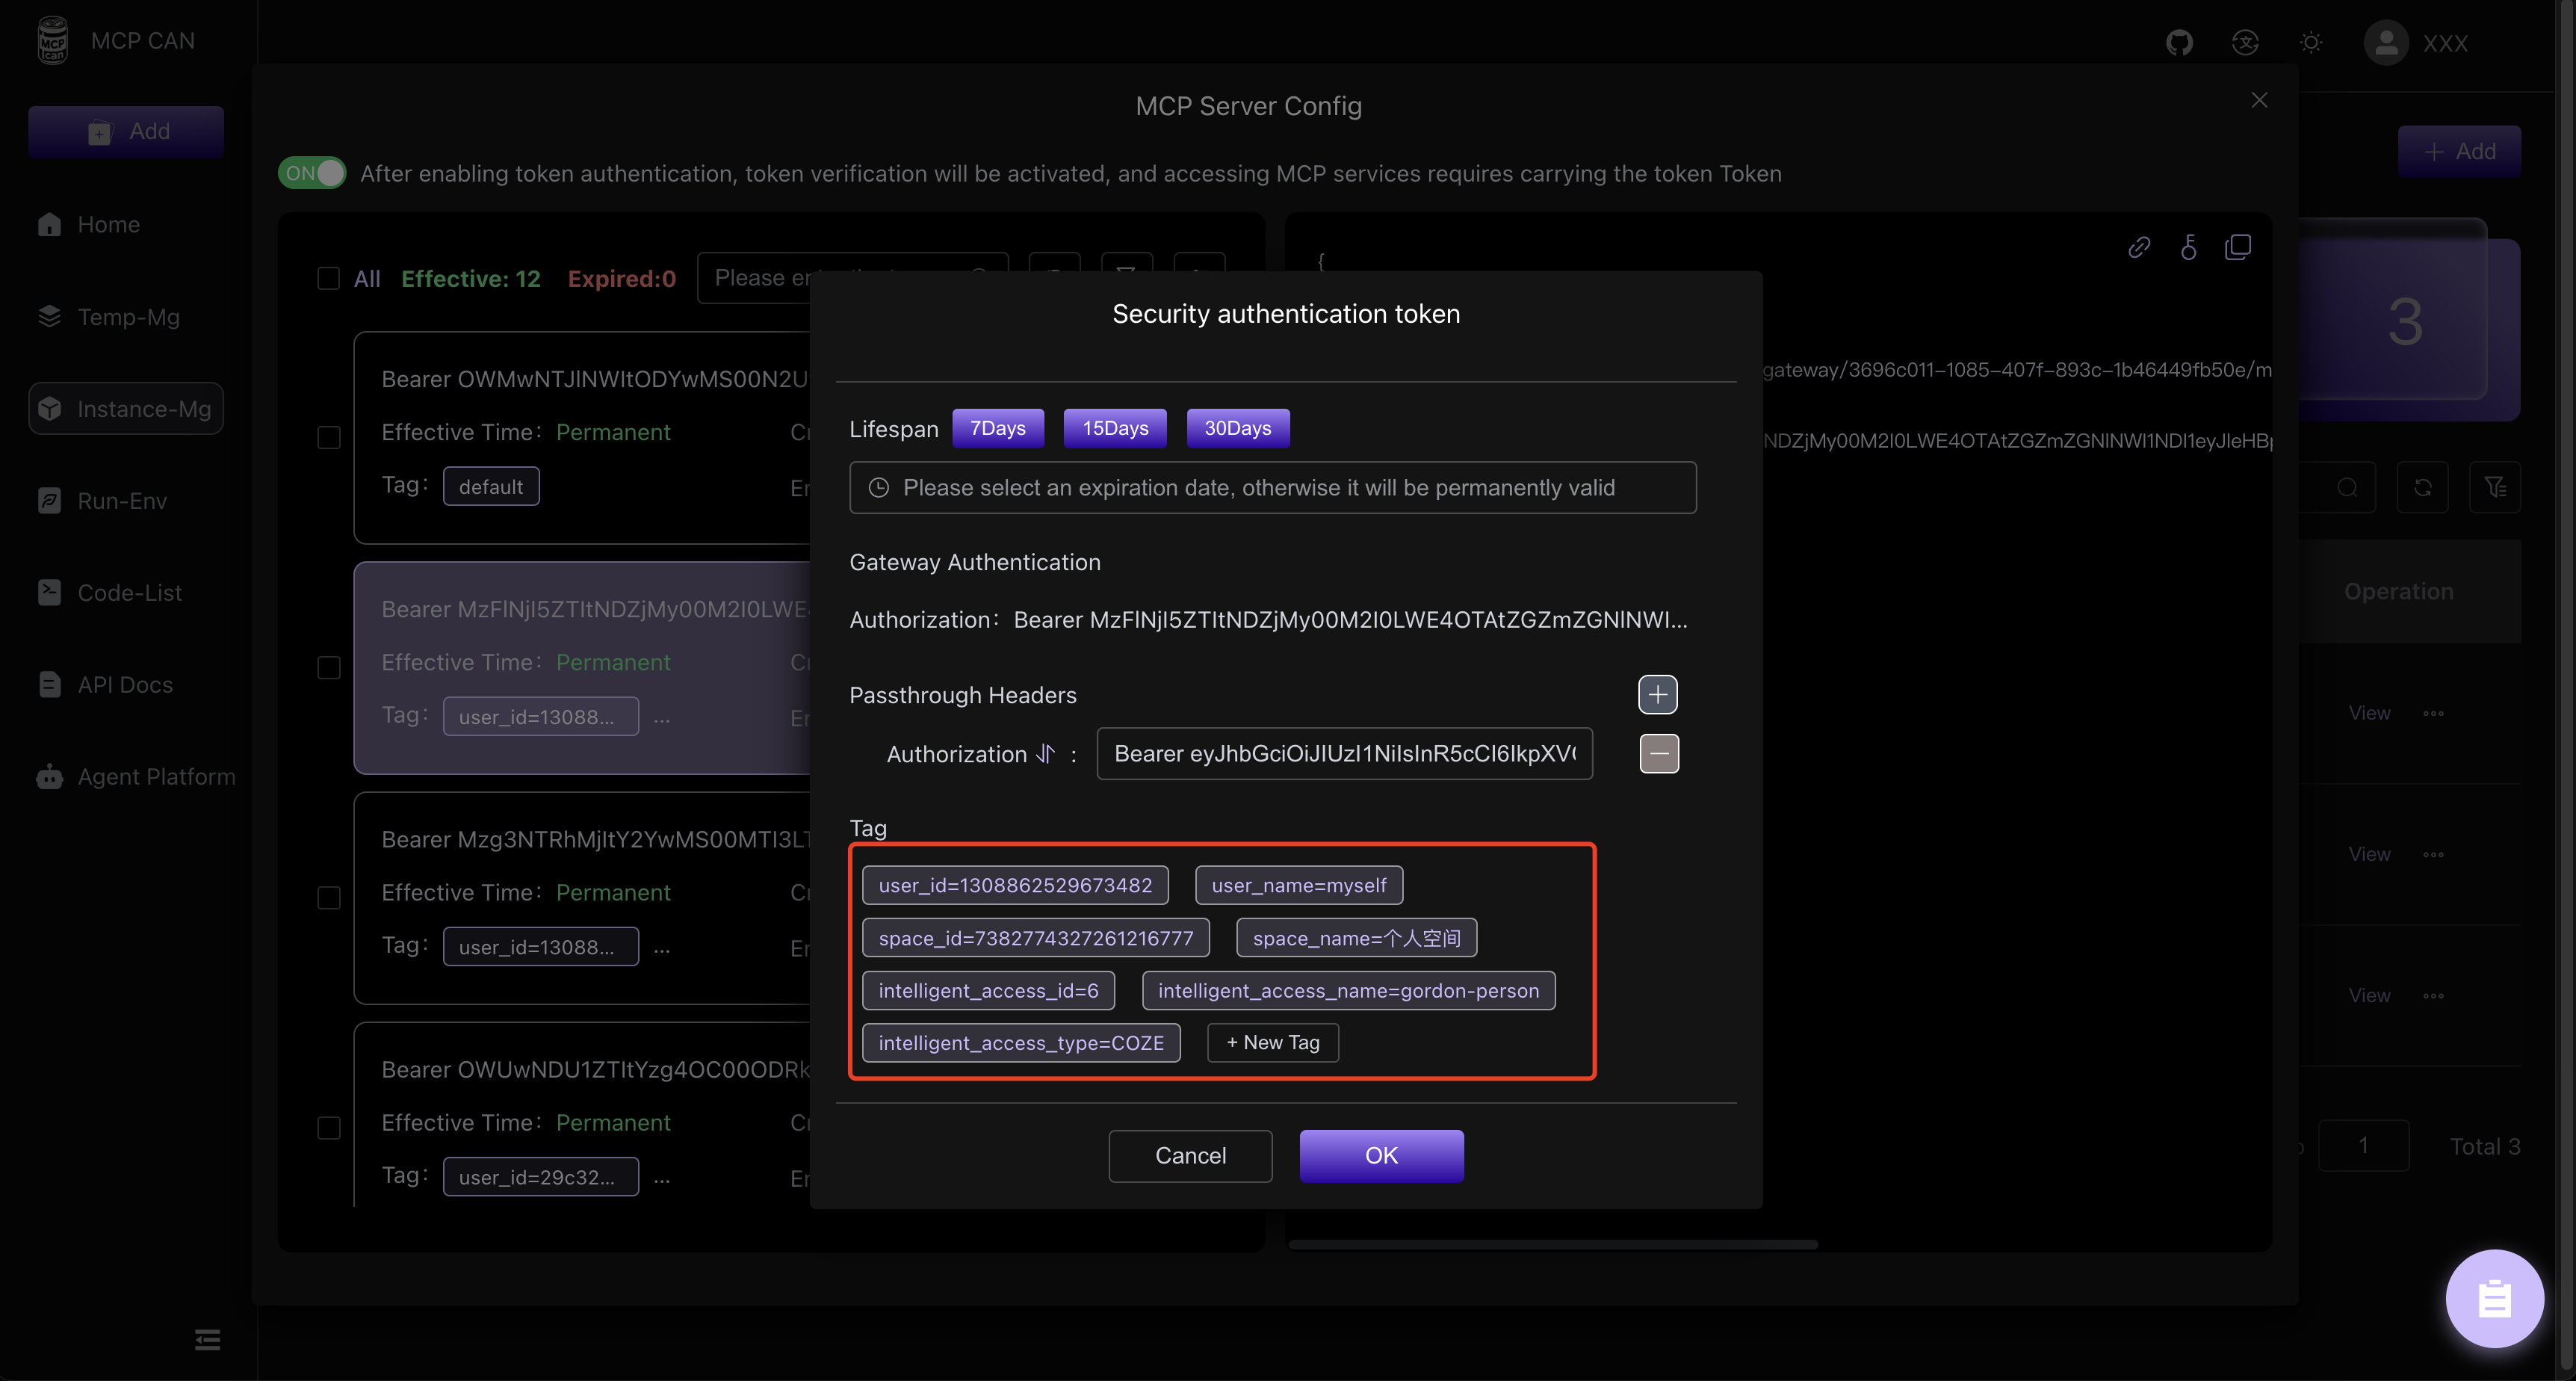
[Instance-Mg] -> [Config]
In MCP Access Configuration, you can view the authorization information for each space, modify the pass-through headers, and decide whether to disable authorization access for a specific space.