MCP Service Synchronization to DIFY Platform Case Study
1. Case Overview
This case aims to provide a detailed explanation of the complete process of selecting the MCP services to be synchronized from the MCP service management page and synchronizing them to the DIFY intelligent platform, focusing on key steps such as platform selection, namespace configuration, and authentication allocation during the synchronization process, to provide clear operational guidance for users.
2. Prerequisites
- The user has successfully logged into the system and has permission to access the MCP service management page;
- The MCP services to be synchronized have been created or configured, ensuring the service status is normal;
- The DIFY platform has been integrated and is accessible normally;
- The user has permission to perform synchronization operations on the DIFY platform.
3. Operation Steps
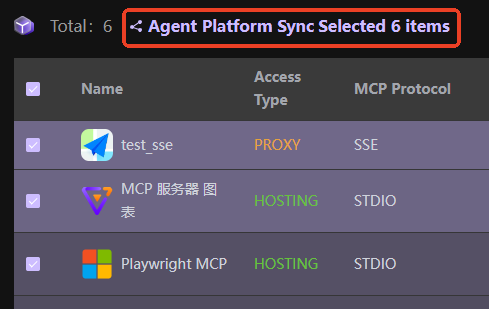
3.1 Select the MCP Services to be Synchronized
After logging into the system, find and click [MCP Service Management] in the left navigation bar to enter the MCP service management page;
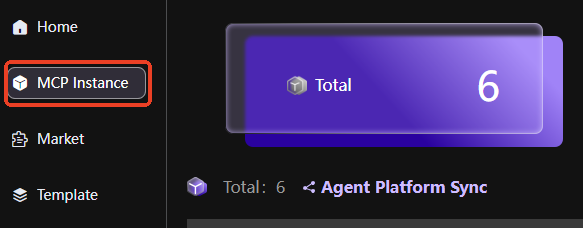
In the service list, check the MCP services to be synchronized to the DIFY platform (multiple selections allowed);
After checking, click the [Intelligent Platform Synchronization] button in the upper right corner of the page.
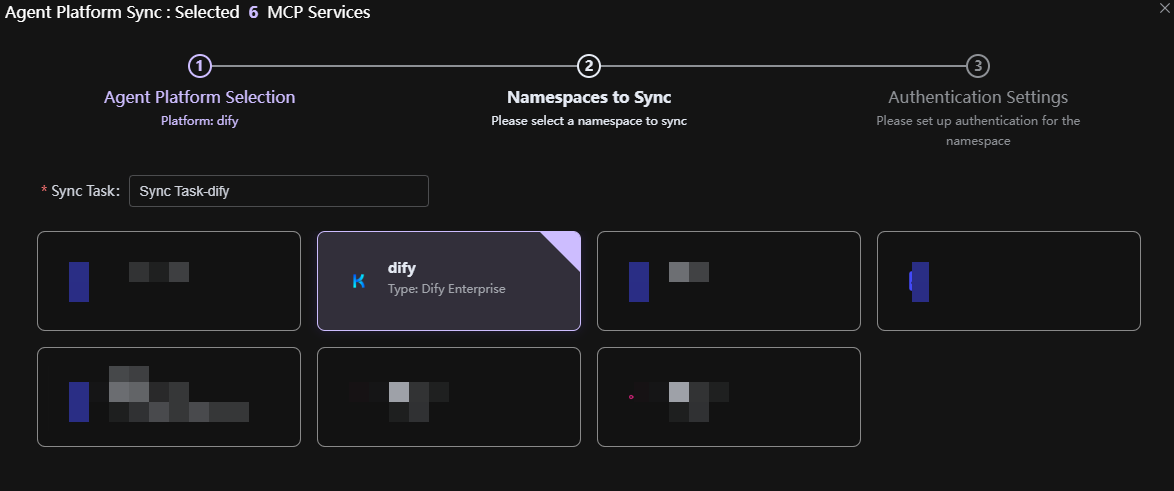
3.2 Select the Synchronization Platform
Note: If there is no synchronization platform information, please find the intelligent platform management page to create intelligent platform connection information.
- In the pop-up synchronization platform selection window, select [DIFY] as the name of the synchronization platform;
- Click the [Next] button to enter the namespace selection page.
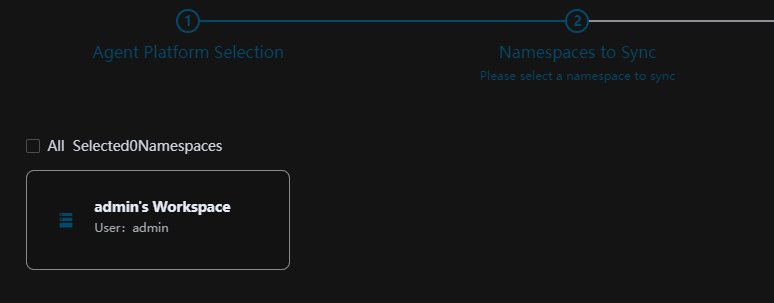
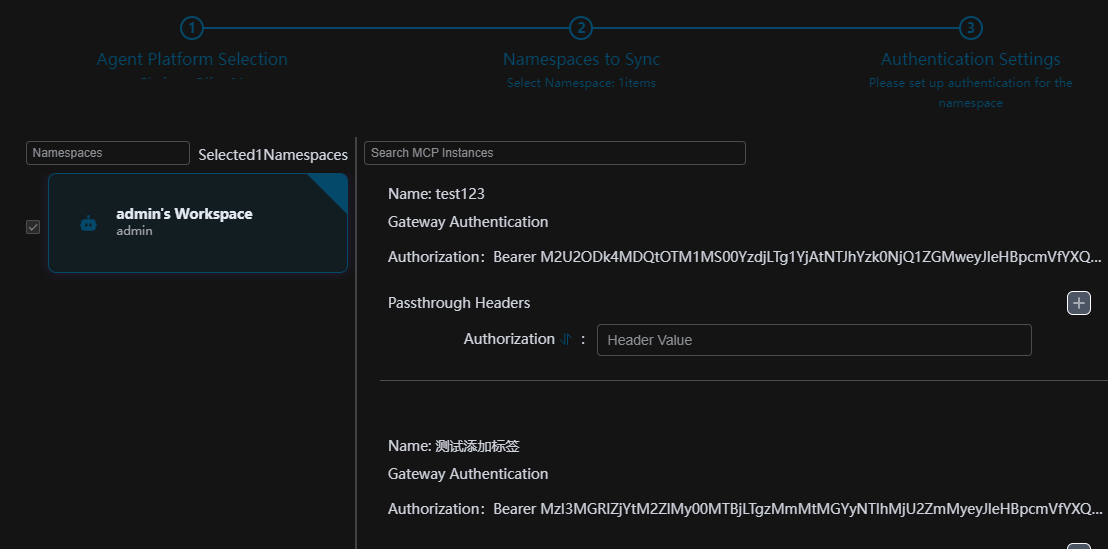
3.3 Select the Namespace
- On the namespace selection page, check the namespaces to be synchronized from the list of available namespaces (multiple selections are supported simultaneously);
- After checking, click the [Next] button to enter the authentication configuration page.
3.4 Perform Authentication Token Allocation
- On the authentication configuration page, allocate tokens for each selected MCP service;
- Enter or generate the corresponding authentication token for each service, ensuring the token format is correct and secure;
- After allocation, the system will verify the validity of the token.
3.5 Confirm Synchronization
- After confirming that all configuration information is correct, click the [Confirm Synchronization] button;
- The system will start executing the synchronization operation, and a success prompt will be displayed after synchronization is completed;
- You can view the synchronized MCP services on the DIFY platform.